


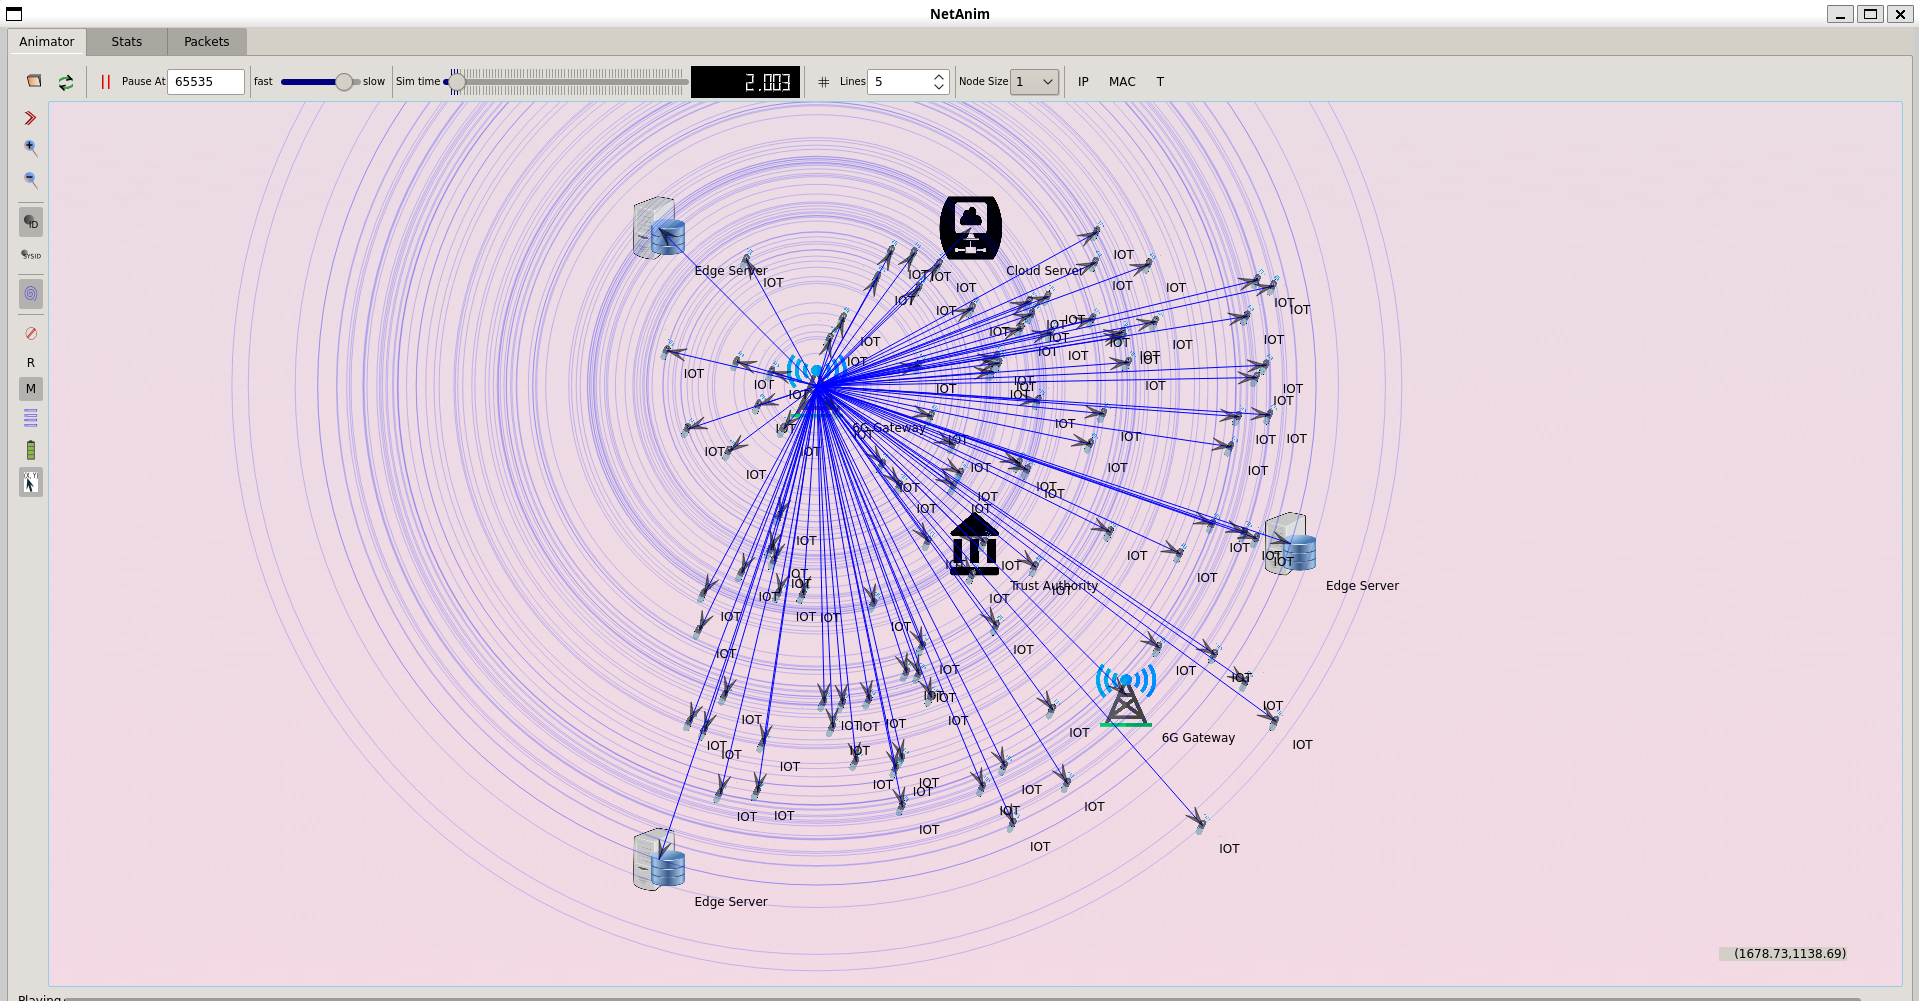
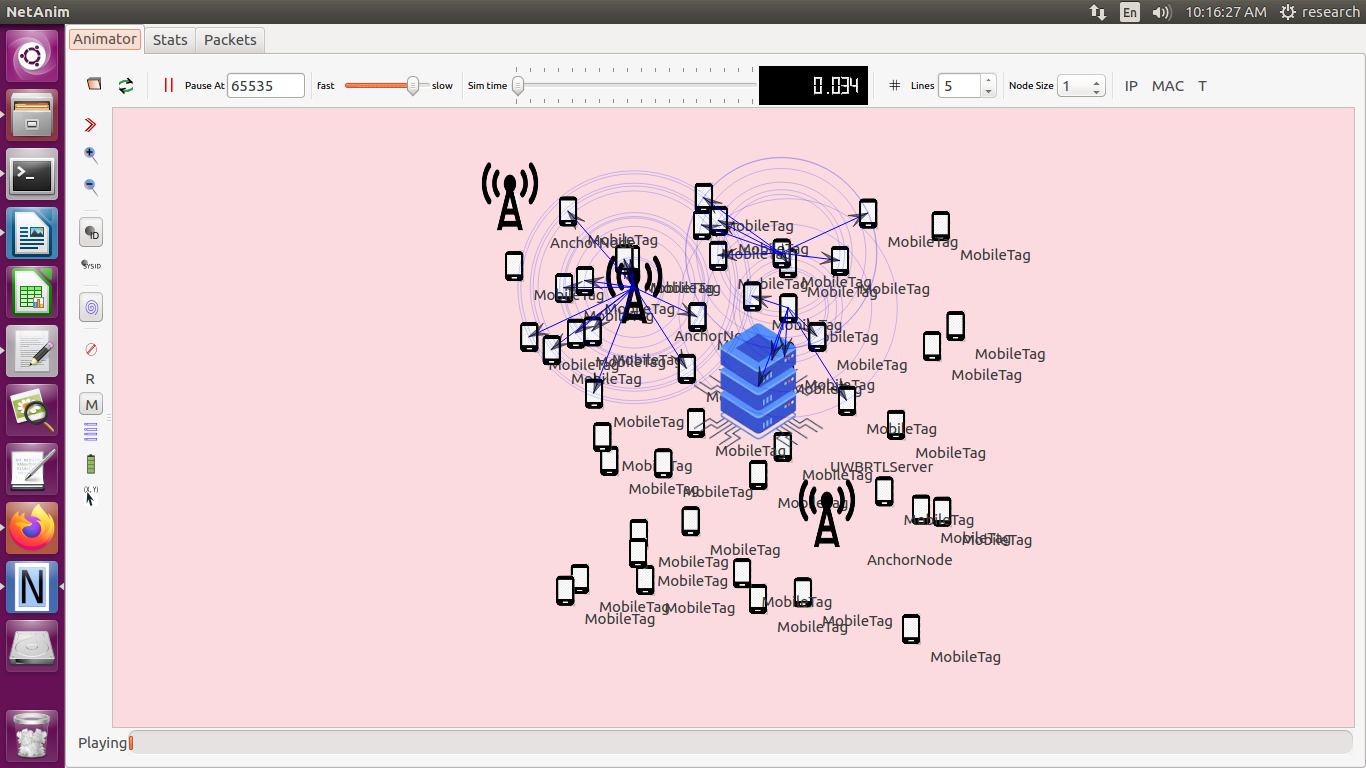
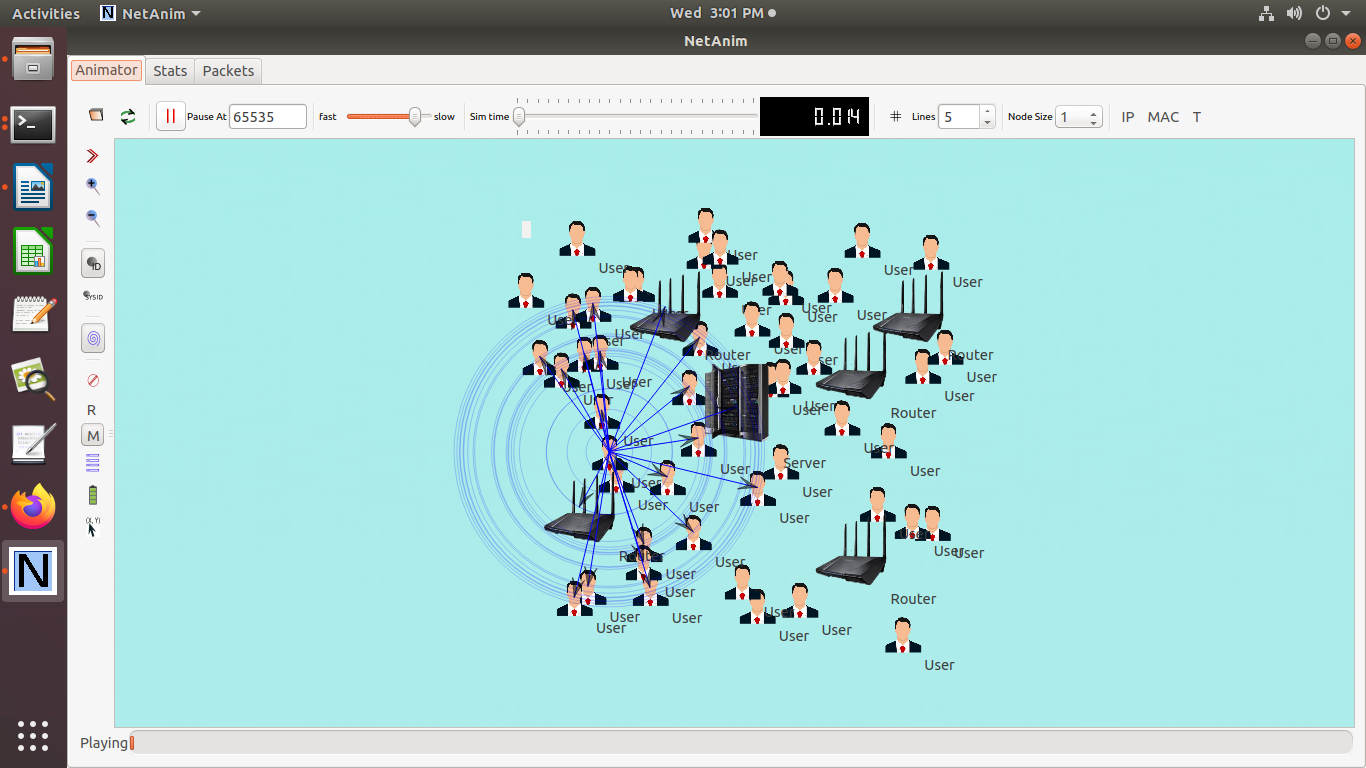
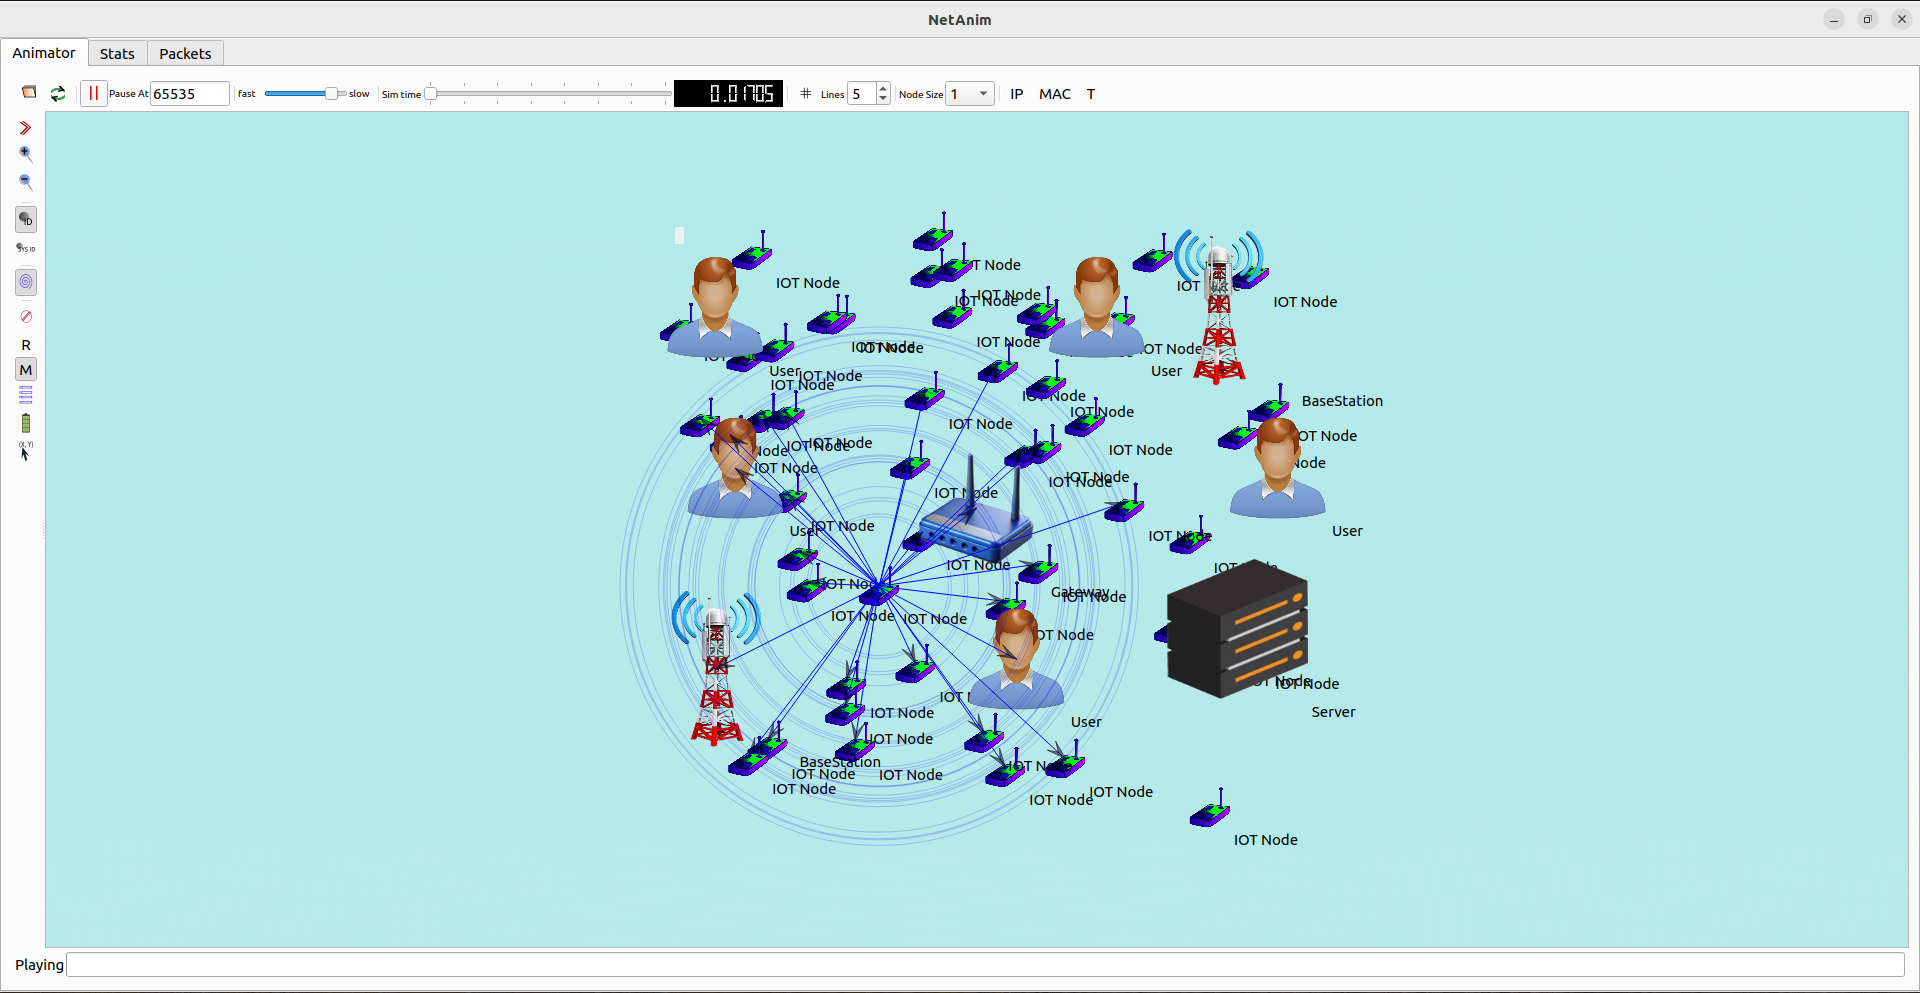
We’ve discussed how NetAnim serves as a graphical animation tool that helps visualize network simulations done with the NS-3 simulator. It lets users see packet transfers, node movements, and various network happenings either in real-time or through a replay. Plus, it comes with customization features like speed control, event filtering, and zooming for a closer look. This makes it super handy for debugging and grasping complicated network situations. NetAnim is a great resource for researchers and developers to better understand network dynamics, making the exploration of networking concepts even more effective.
PyViz offers a range of Python tools that are open-source and perfect for making interactive visualizations effortlessly. With libraries such as HoloViews, GeoViews, and Datashader, it seamlessly integrates with commonly used data science tools. PyViz is particularly great at managing big datasets, allowing for smooth rendering and interactive exploration. Its ecosystem includes useful features like zooming, panning, and data selection, which enhance the intuitiveness of data analysis. By using PyViz, data scientists can create impactful visualizations with minimal coding, improving data comprehension and communication.
Look out for the installation steps in NetAnim.
Screenshot:
Screenshot:
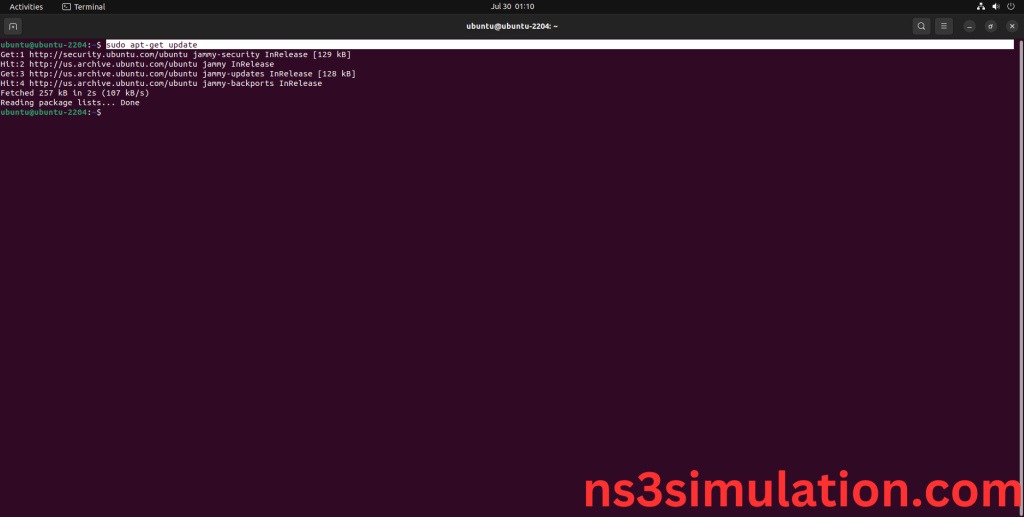
2.System File Update Command:
First of all, we need to updates the list of available packages and their versions stored in the system’s package index. Use below command to update the system package.
Command: “sudo apt-get update”
Screenshot:
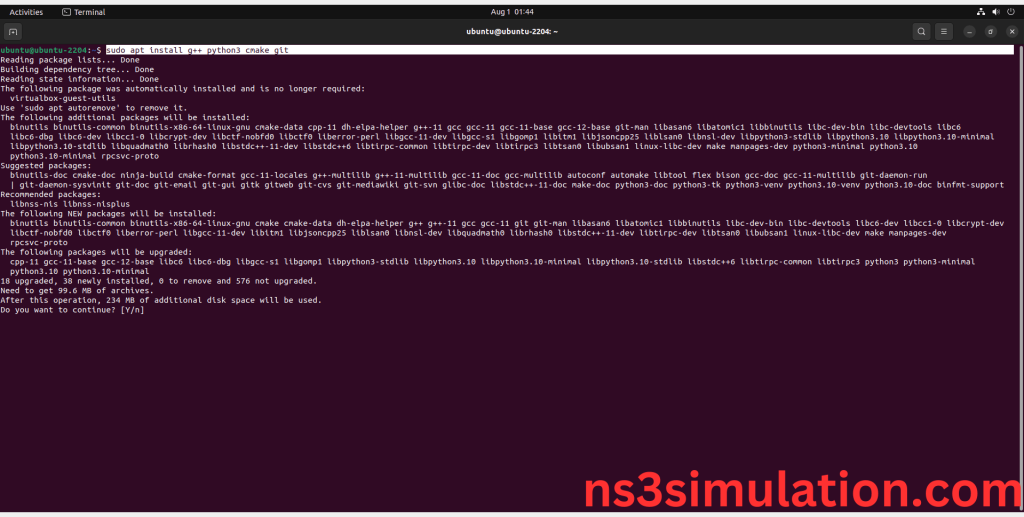
3.Install Essential Tools:
Command: “sudo apt install g++ python3 cmake git”
Screenshot:
Click the key Y to install the required Essentials tools for giving permission to install the package in the user system.
Screenshot:
Installation of the Essential tools package completed successfully.
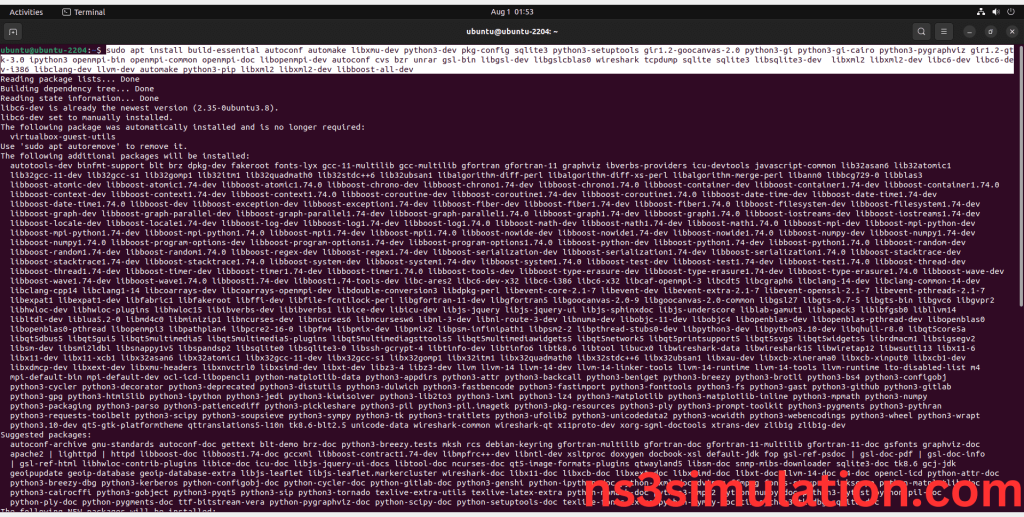
Command:
“sudo apt install build-essential autoconf automake libxmu-dev python3-dev pkg-config sqlite3 python3-setuptools openmpi-bin openmpi-common openmpi-doc libopenmpi-dev autoconf cvs bzr unrar gsl-bin libgsl-dev libgslcblas0 wireshark tcpdump sqlite sqlite3 libsqlite3-dev libxml2 libxml2-dev libc6-dev libc6-dev-i386 libclang-dev llvm-dev automake python3-pip libxml2 libxml2-dev libboost-all-dev”
Screenshot:
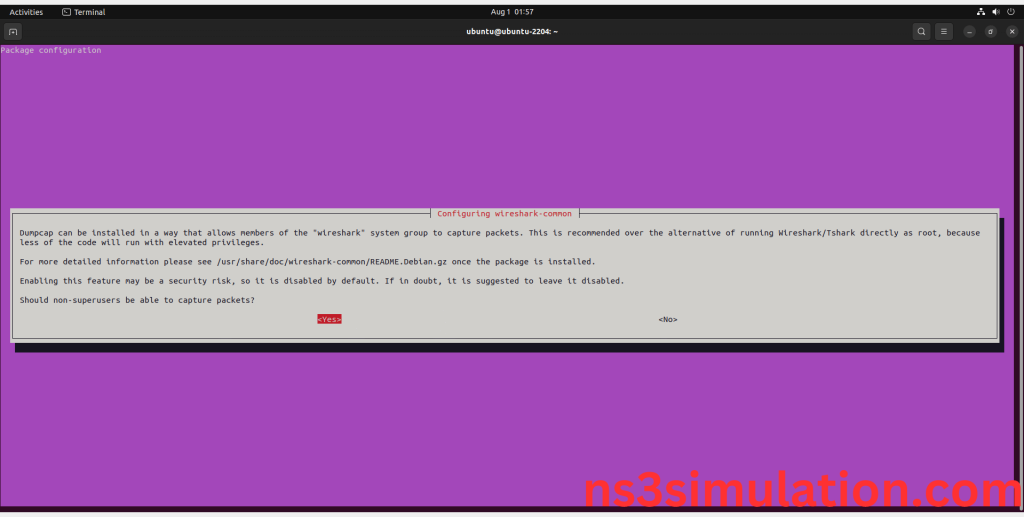
Click Yes to install wireshark packages to capture the packets from Network simulator 3.
Screenshot:
Screenshot:
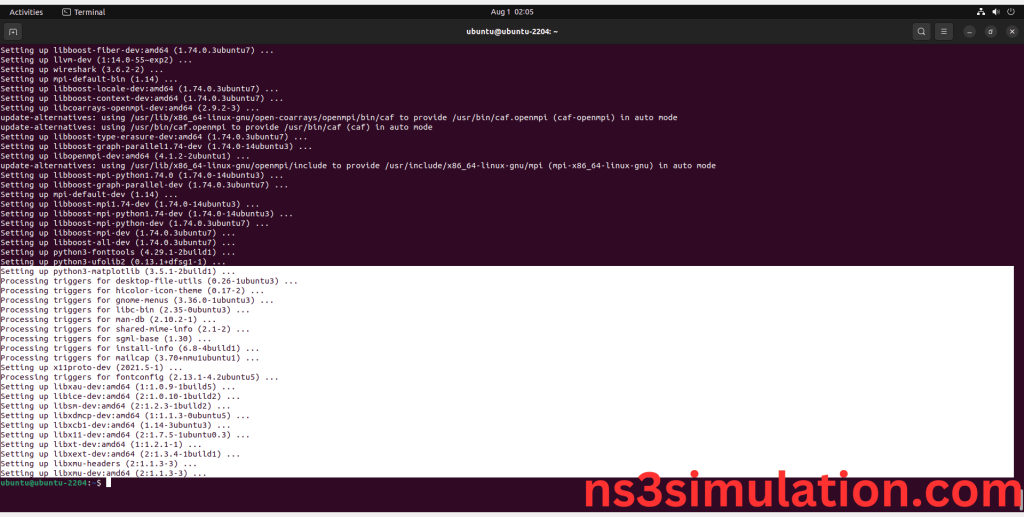
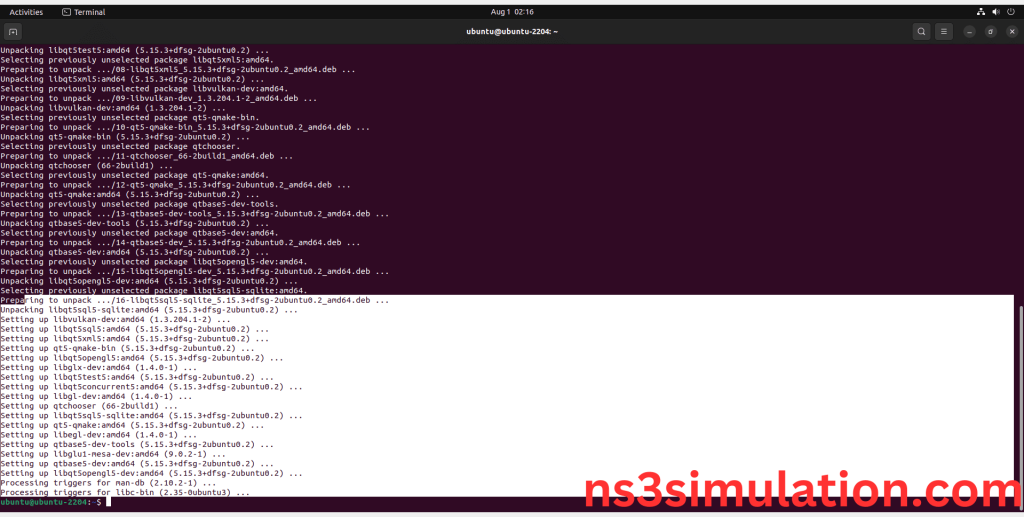
Installation of the Required Libraries and Development Tools package completed successfully.
Next, we need to install NetAnim Required Libraries and Tools such as QT packages in the ubuntu system. Use below command to install the NetAnim package.
Command: “sudo apt-get install qtbase5-dev qtchooser qt5-qmake qtbase5-dev-tools”
apt install gir1.2-goocanvas-2.0 python3-gi python3-gi-cairo python3-pygraphviz gir1.2-gtk-3.0 ipython3
Screenshot:
If you get Prompt like [Y/N], then Click Y to install these additional Packages.
Screenshot:
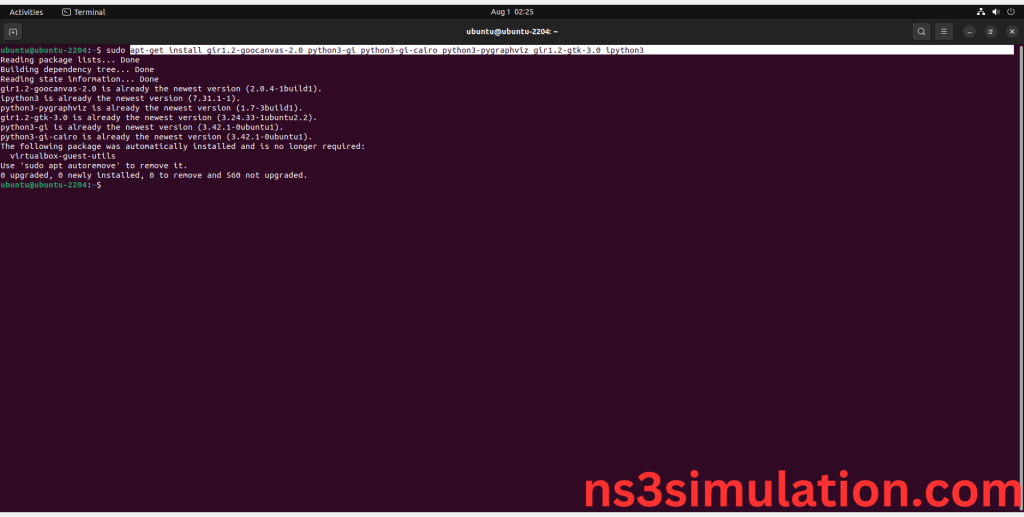
5.Install PyViz Required Libraries and Tools:
Next, we need to install PyViz Required Libraries and Tools such as Graphviz packages in the ubuntu system. Use below command to install the PyViz package.
Command: “sudo apt-get install gir1.2-goocanvas-2.0 python3-gi python3-gi-cairo python3-pygraphviz gir1.2-gtk-3.0 ipython3”
Screenshot:
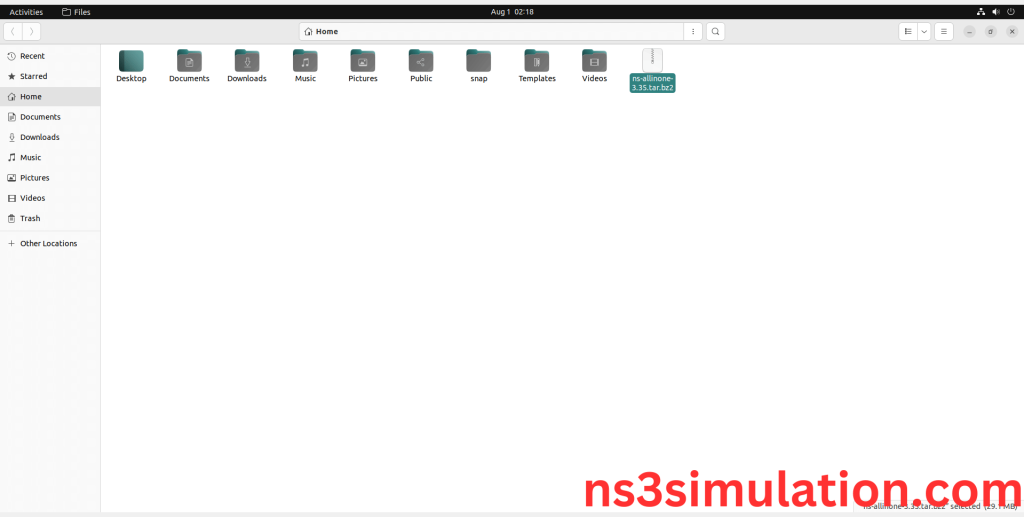
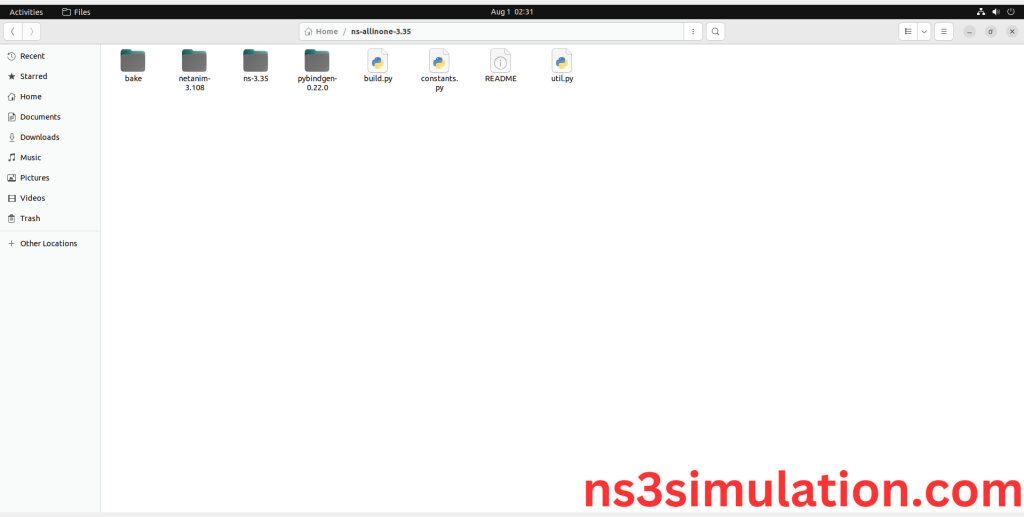
We have to download the ns-allinone-3.35.tar.bz2 under home directory by the clicking the Link, it will directly download to Download Location and move the compressed file to the home Directory.
Link: https://www.nsnam.org/releases/ns-allinone-3.35.tar.bz2
Screenshot:
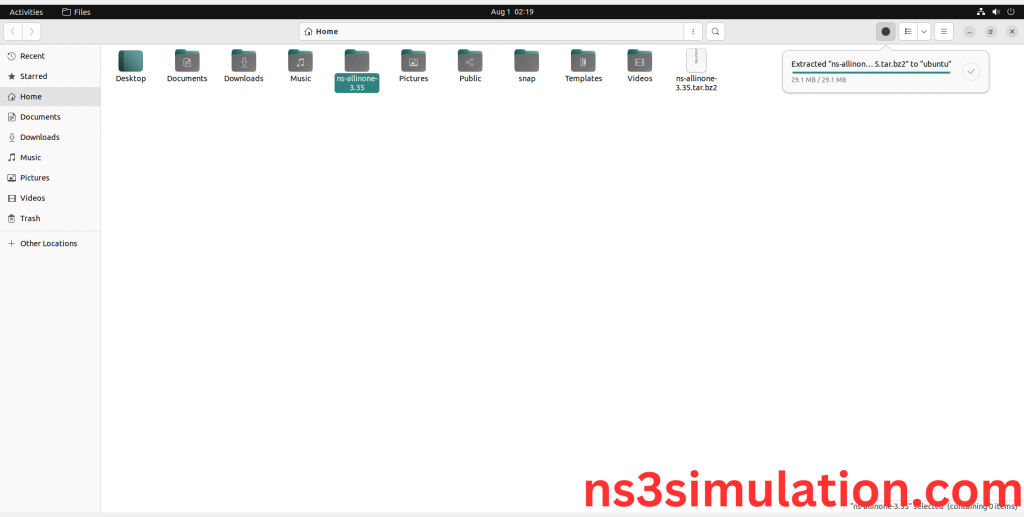
2.Extraction of the ns-allinone-3.35.tar.bz2 file:
Next, we have to extract the compressed file by right click and click Extract here to extract the ns-allinone-3.35 as folder in the home directory.
Screenshot:
Screenshot:
ns-allinone-3.35 compressed file Extracted Successfully in the home directory.
Next, we need to install the NS 3 in our system so locate the Extracted ns-allinone-3.35 folder in the home directory.
Screenshot:
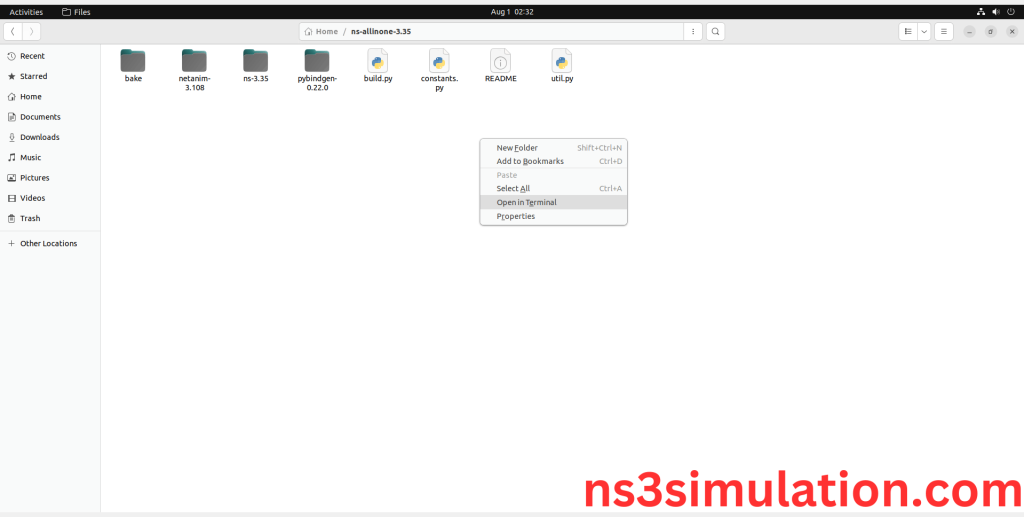
4.Launching the terminal in the ns-allinone-3.35 Folder:
Then Right Click in the current Directory and select the “Open in Terminal” button and it will launch the terminal.
Screenshot:
Here, we launched the terminal by that button in the folder.
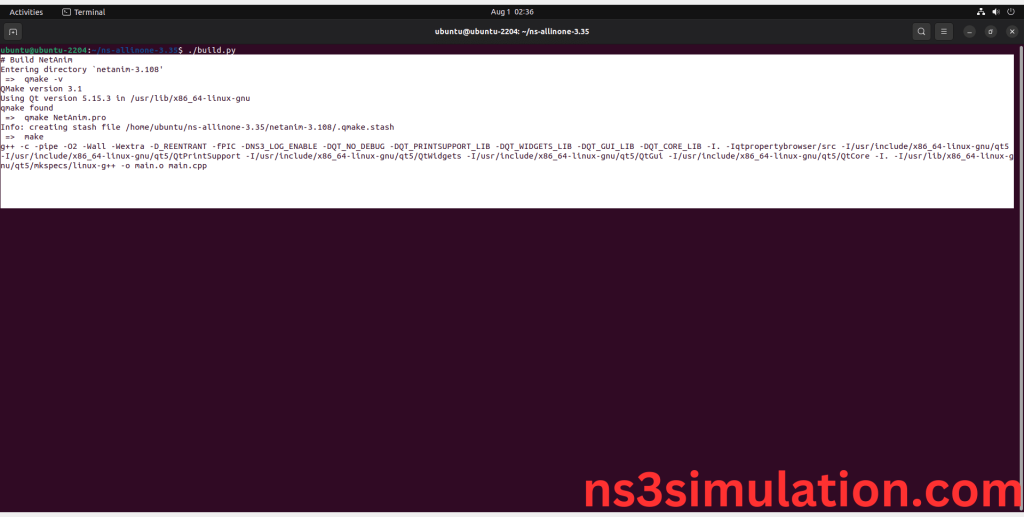
5.Building the terminal in the ns-allinone-3.35 Folder:
Next, we need to build the ns-3.35 to install the network simulation 3 Environment in the User system and it will build the netanim also. So, use the command to build the ns-3.35.
Command: “./build.py”
Screenshot:
6.Netanim Building process:
Here we will display the NetAnim building process by giving above command it will automatically build the NetAnim.
Screenshot:
Here We shown the NetAnim built Successfully.
Screenshot:
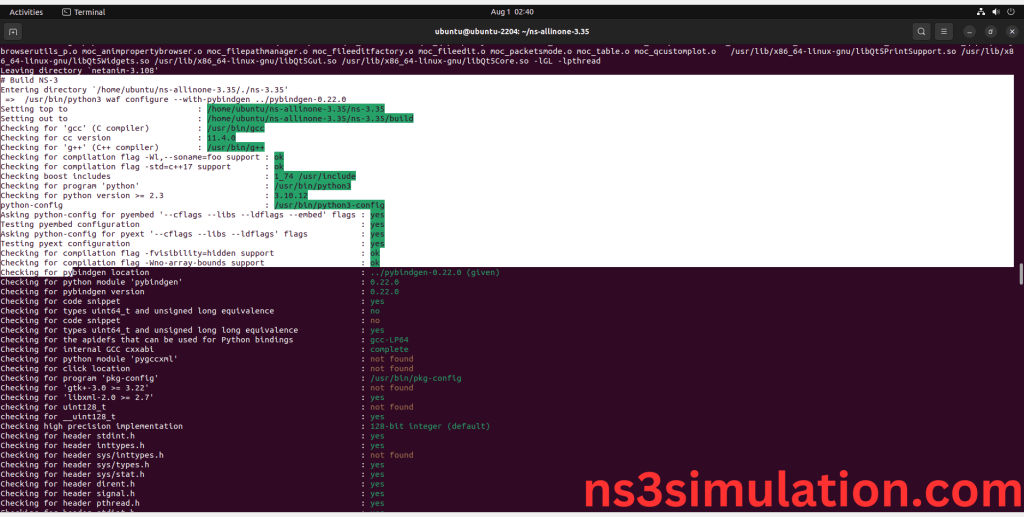
7.Ns-3.35 Configuring process:
Here, we will show the Configuration process that will check the packages required for ns-3.35 tools by giving above command it will automatically Configure the ns-3.35.
Screenshot:
The “./ns3 configure” command is to configure the Network Simulator 3 (NS-3) environment. This command is typically used to set various parameters, such as the simulation duration, network topology, and node properties. It can also be used to specify the output format and other simulation settings.
Screenshot:
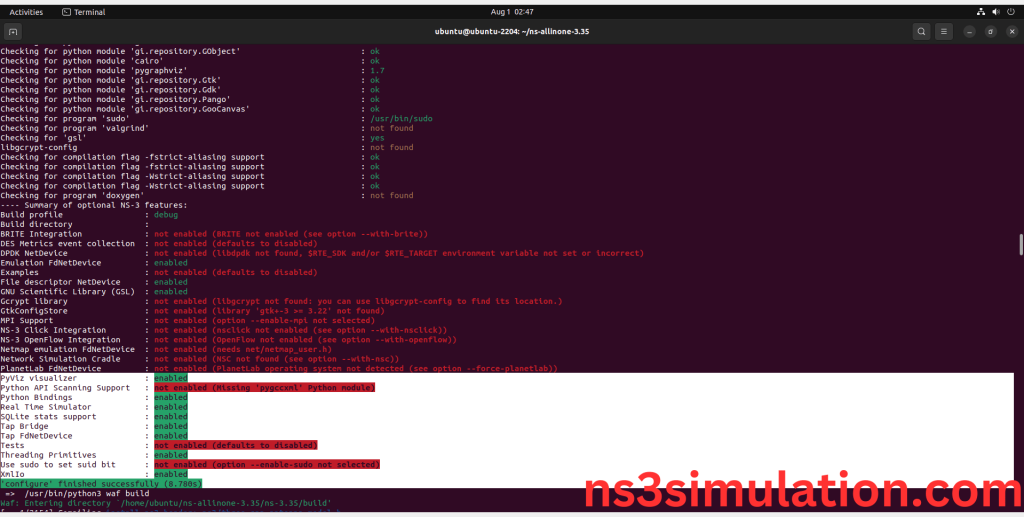
Ns-3.35 Configuration Completed successfully.
8.Enable PyViz Visualizer:
Here we shown the PyViz enabled in ns-3.35 Configuration process by using previous Enabling PyViz commands.
Screenshot:
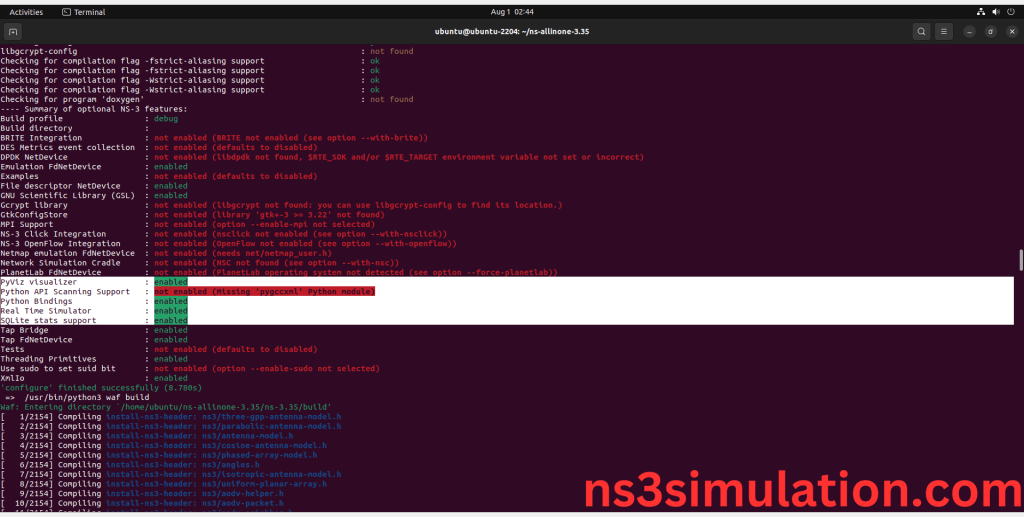
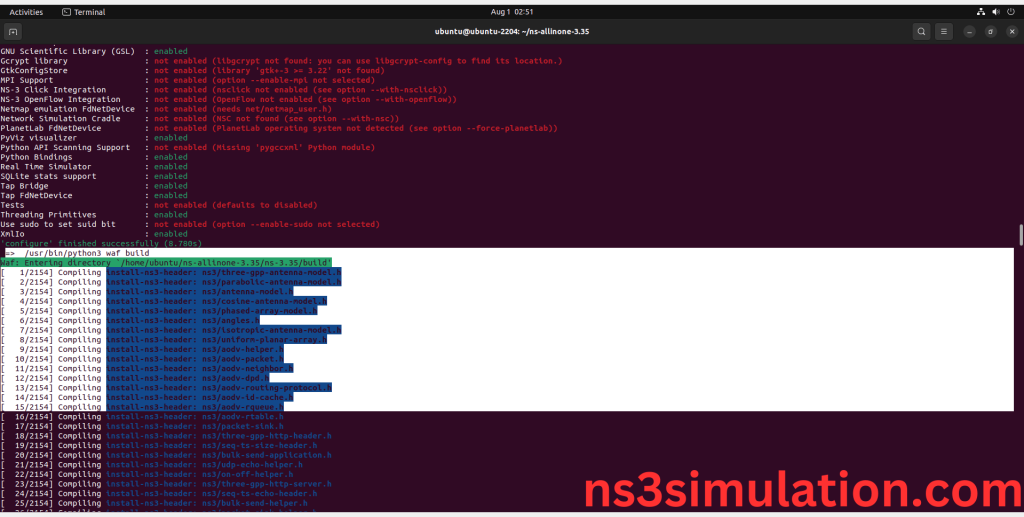
9.Ns-3.35 Building process:
Here, we will show the building process that will build the files in the ns-3.35 Source files by giving above command it will automatically build the ns-3.35.
Screenshot:
The “./ns3 build” command is used to build the Network Simulator 3 (NS-3) framework from its source code. When use this command, It will compiles the source code, generates the Makefiles, and builds the NS-3 binary and libraries and make Runnable Environment.
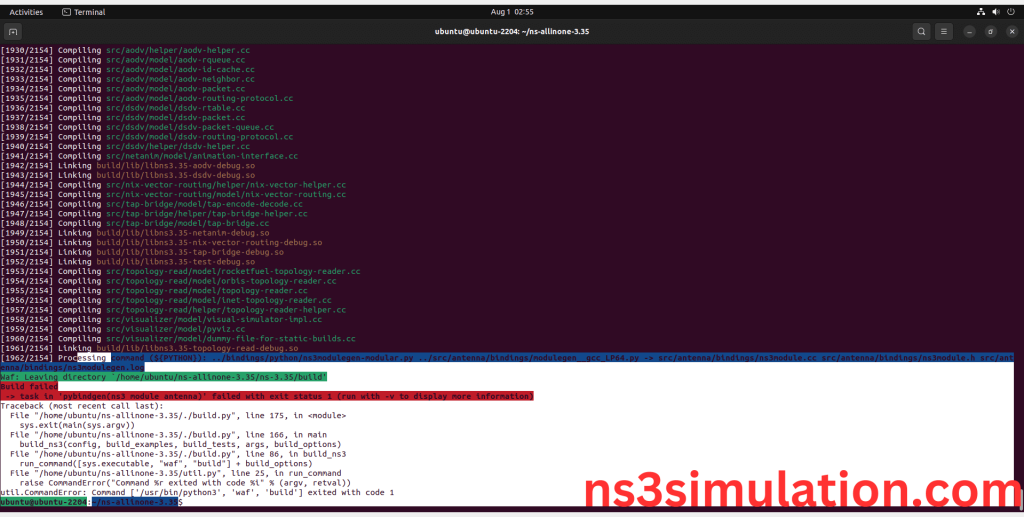
Screenshot:
Note: This Error will occur due to pybindgen configuration so follow the Python bindings Enabling Procedure as Below.
10.Enable Python Bindings:
The Python bindings for NS-3 are a set of Python modules that allow you to use the Network Simulator 3 (NS-3) library from within Python. With the Python bindings, you can leverage the power of NS-3 to simulate and analyse network behaviour without needing to write code in C++.
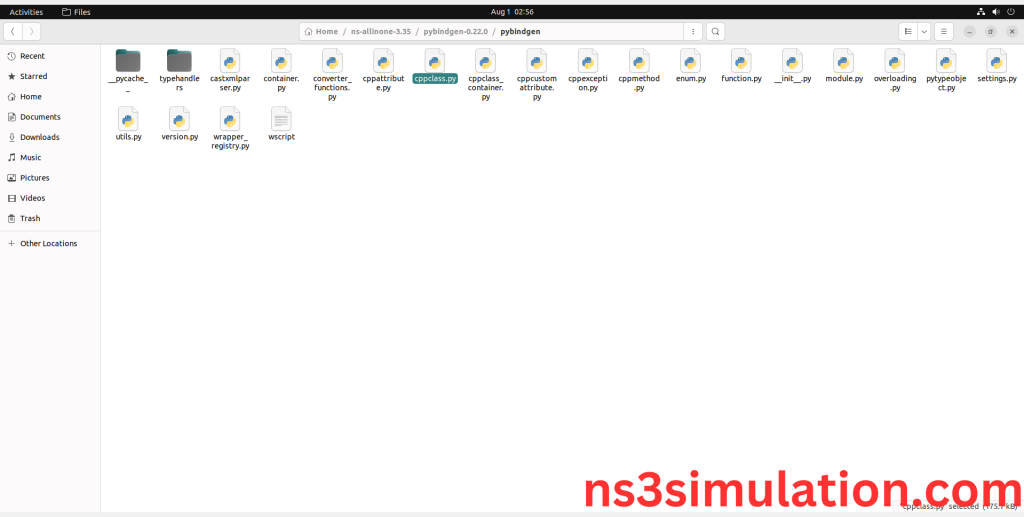
Next, we will locate the cppclass.py file in /home/<your-user-name>/ns-allinone-3.35/pybindgen-0.22.0/pybindgen/ cppclass.py
Screenshot:
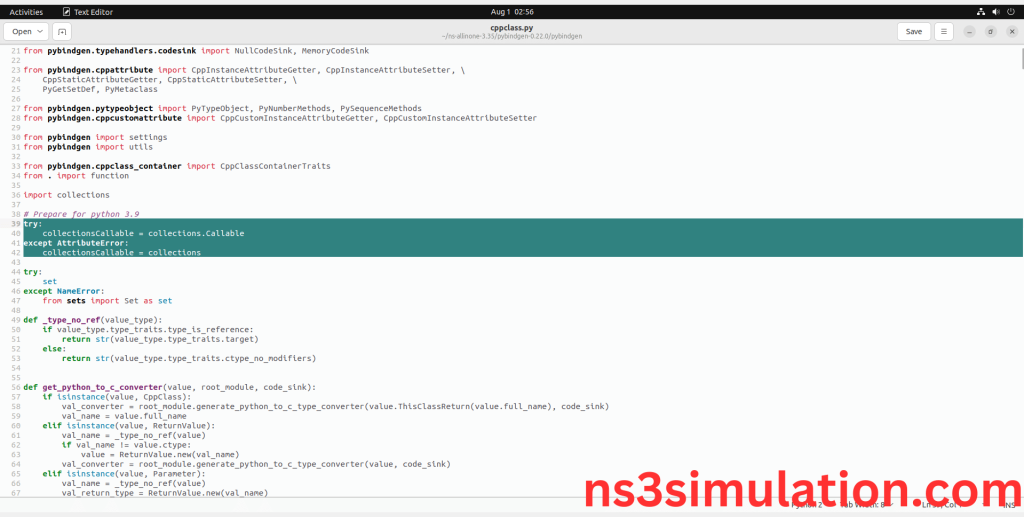
Next, we need to open cppclass.py file in the text Editor by right clicking the file and Edit the following file code with below screenshot.
Screenshot:
Here we installed the python bindings required packages successfully.
11.Ns-3.35 Location Change:
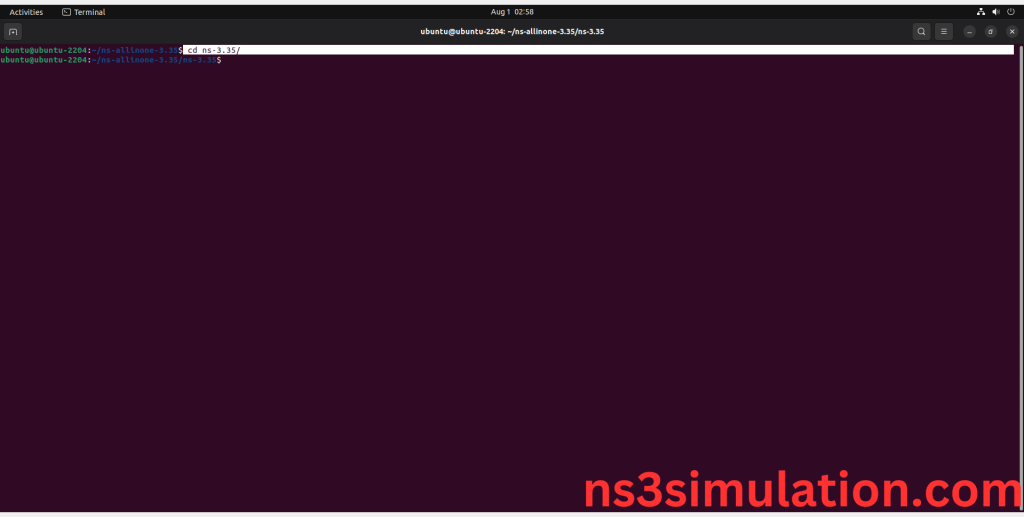
Change the location to the ns-3.35.
Command: “cd ns-3.35”
Screenshot:
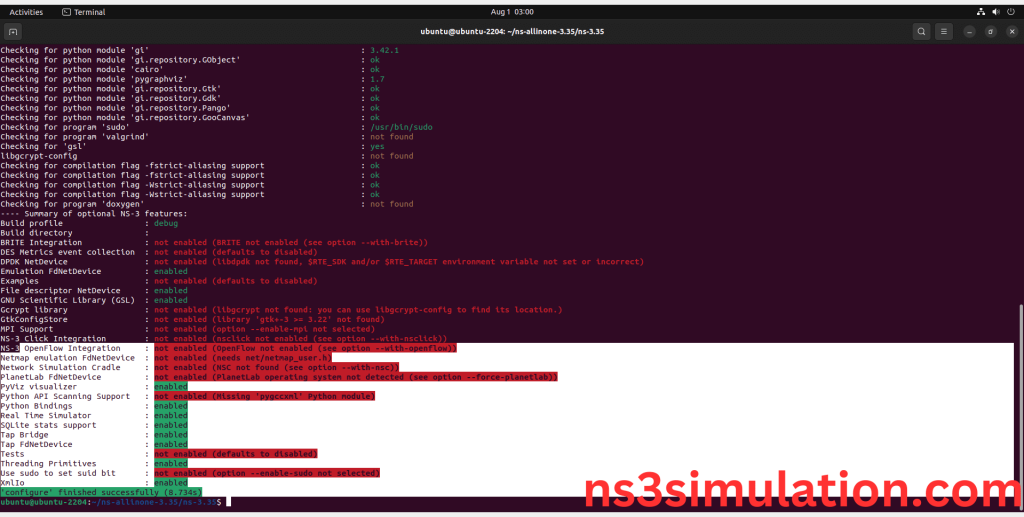
12.Ns-3.35 Configuring process:
The Ns 3.35 configuration of the Network Simulator 3 (NS-3) environment. This command is typically used to set various parameters, such as the simulation duration, network topology, and node properties. It can also be used to specify the output format and other simulation settings.
Command: “./waf configure”
Screenshot:
Ns-3.35 Configuration Completed successfully.
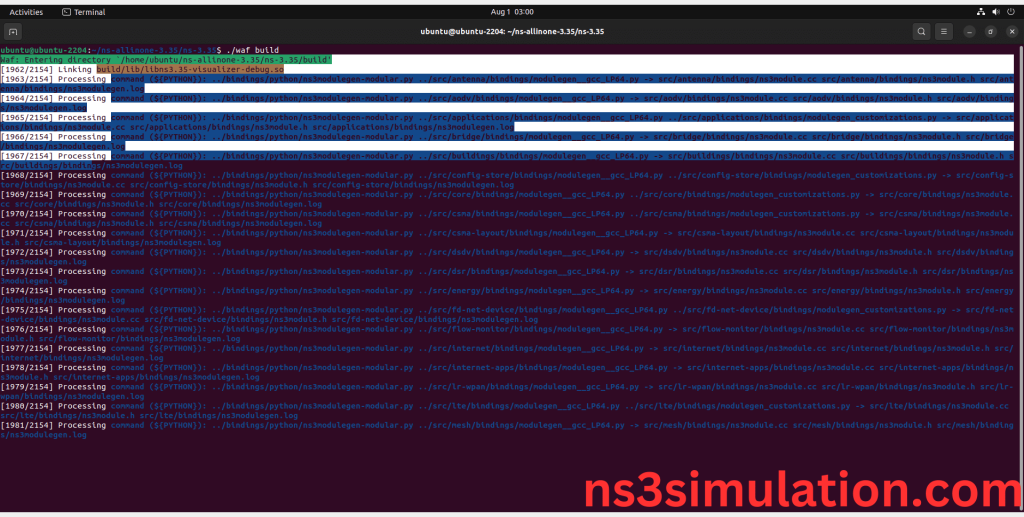
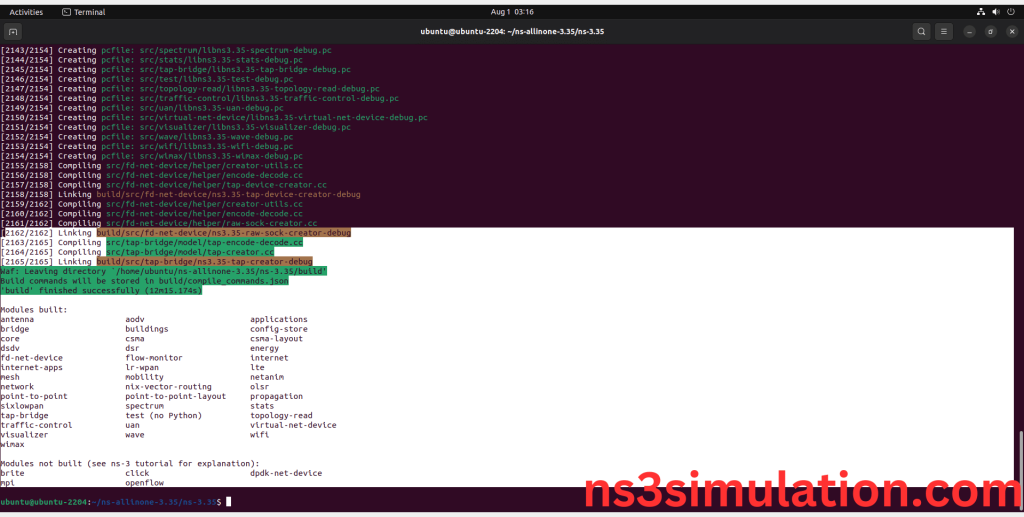
13.Ns-3.35 Building process:
The “./waf build” command is used to build the Network Simulator 3 (NS-3) framework from its source code. When use this command, It will compiles the source code, generates the Makefiles, and builds the NS-3 binary and libraries and make Runnable Environment.
Command: “. /waf build”
Screenshot:
Screenshot:
Ns-3.35 Installed successfully in the Ubuntu 22.04 system.
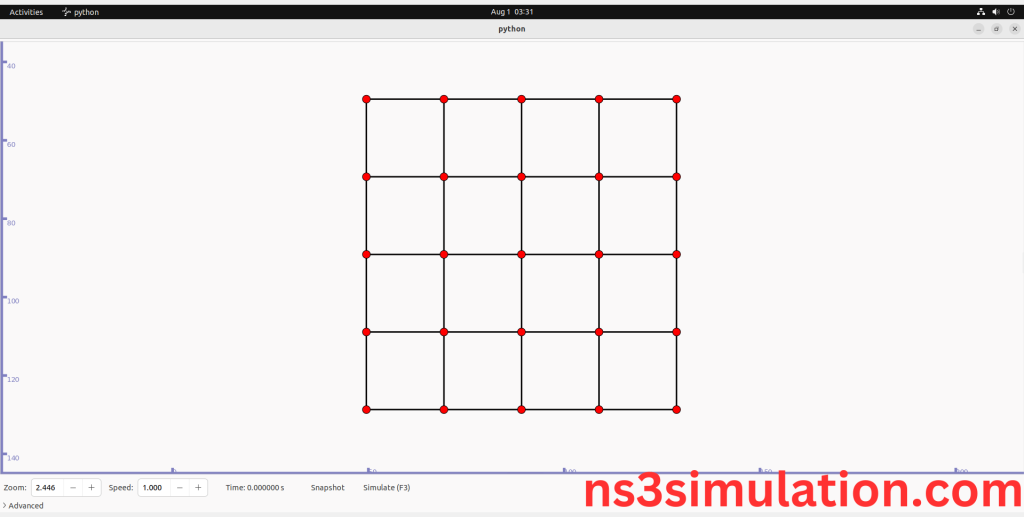
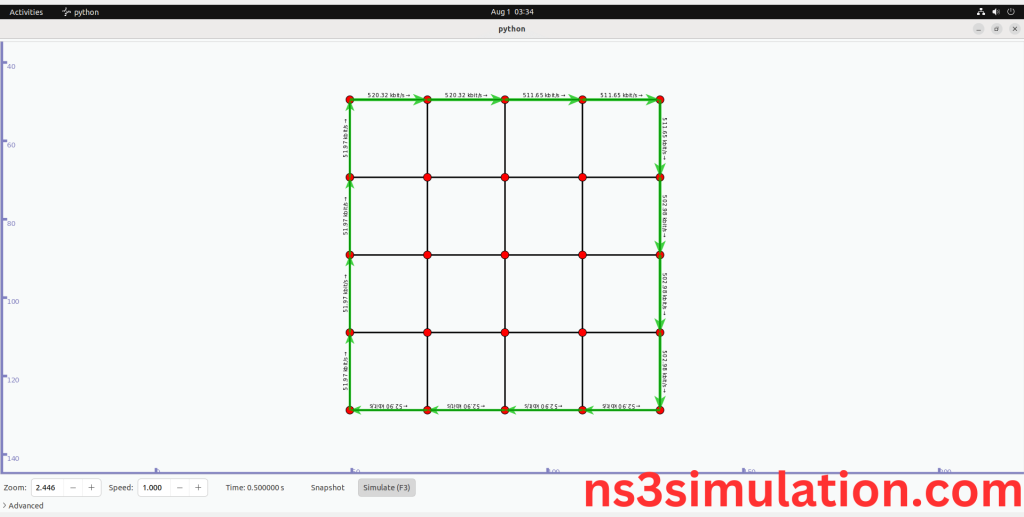
14.Simulation of Example code for PyVizualizer and NetAnim:
Next, we have taken example file from ns-3.35 source folder. Here, we need copy file from example folder in the src folder of the ns-3.35 and Use below command to run the Scratch file.
Command: “./waf configure && ./waf build && ./waf –run grid-animation –vis”
PyVizualizer:
Screenshot:
Screenshot:
NetAnim:
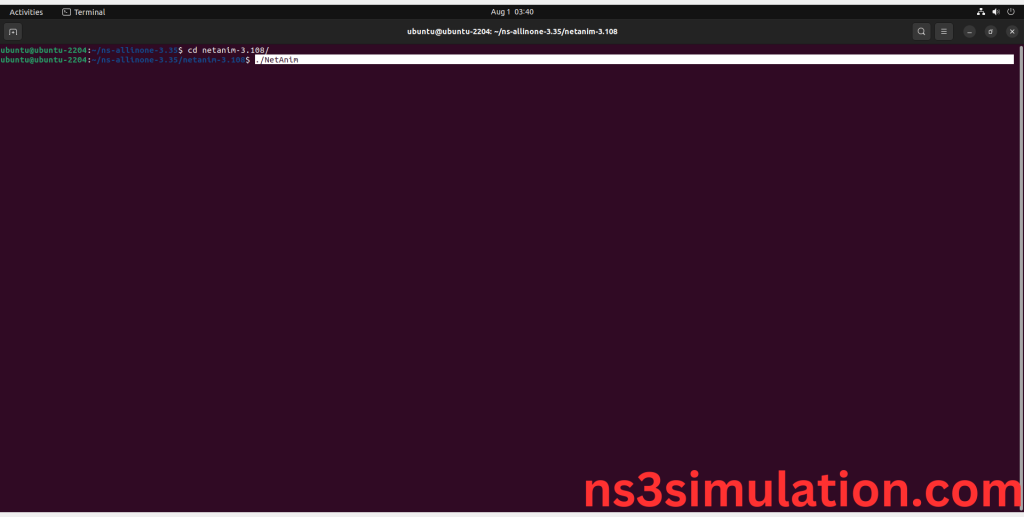
To Launch the NetAnim, you need to locate the ns-allinone-3.35 directory and need to move to netanim-3.108 folder and Use below Commands to launch the NetAnim.
Command: “./NetAnim”
Screenshot:
Screenshot:
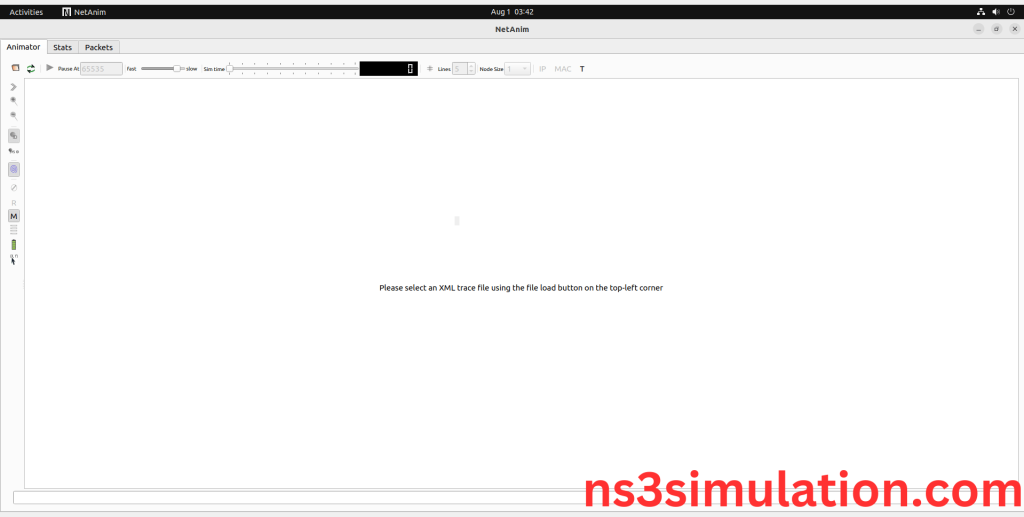
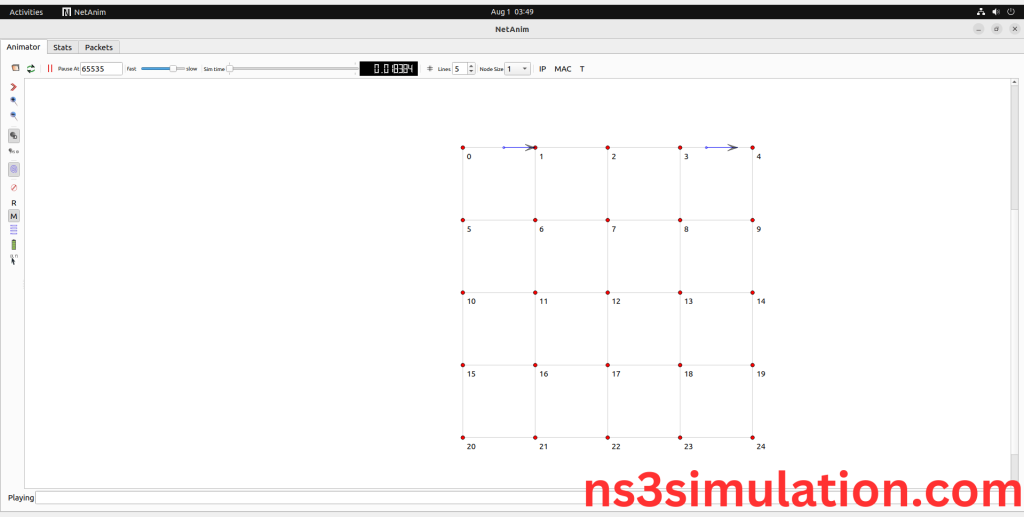
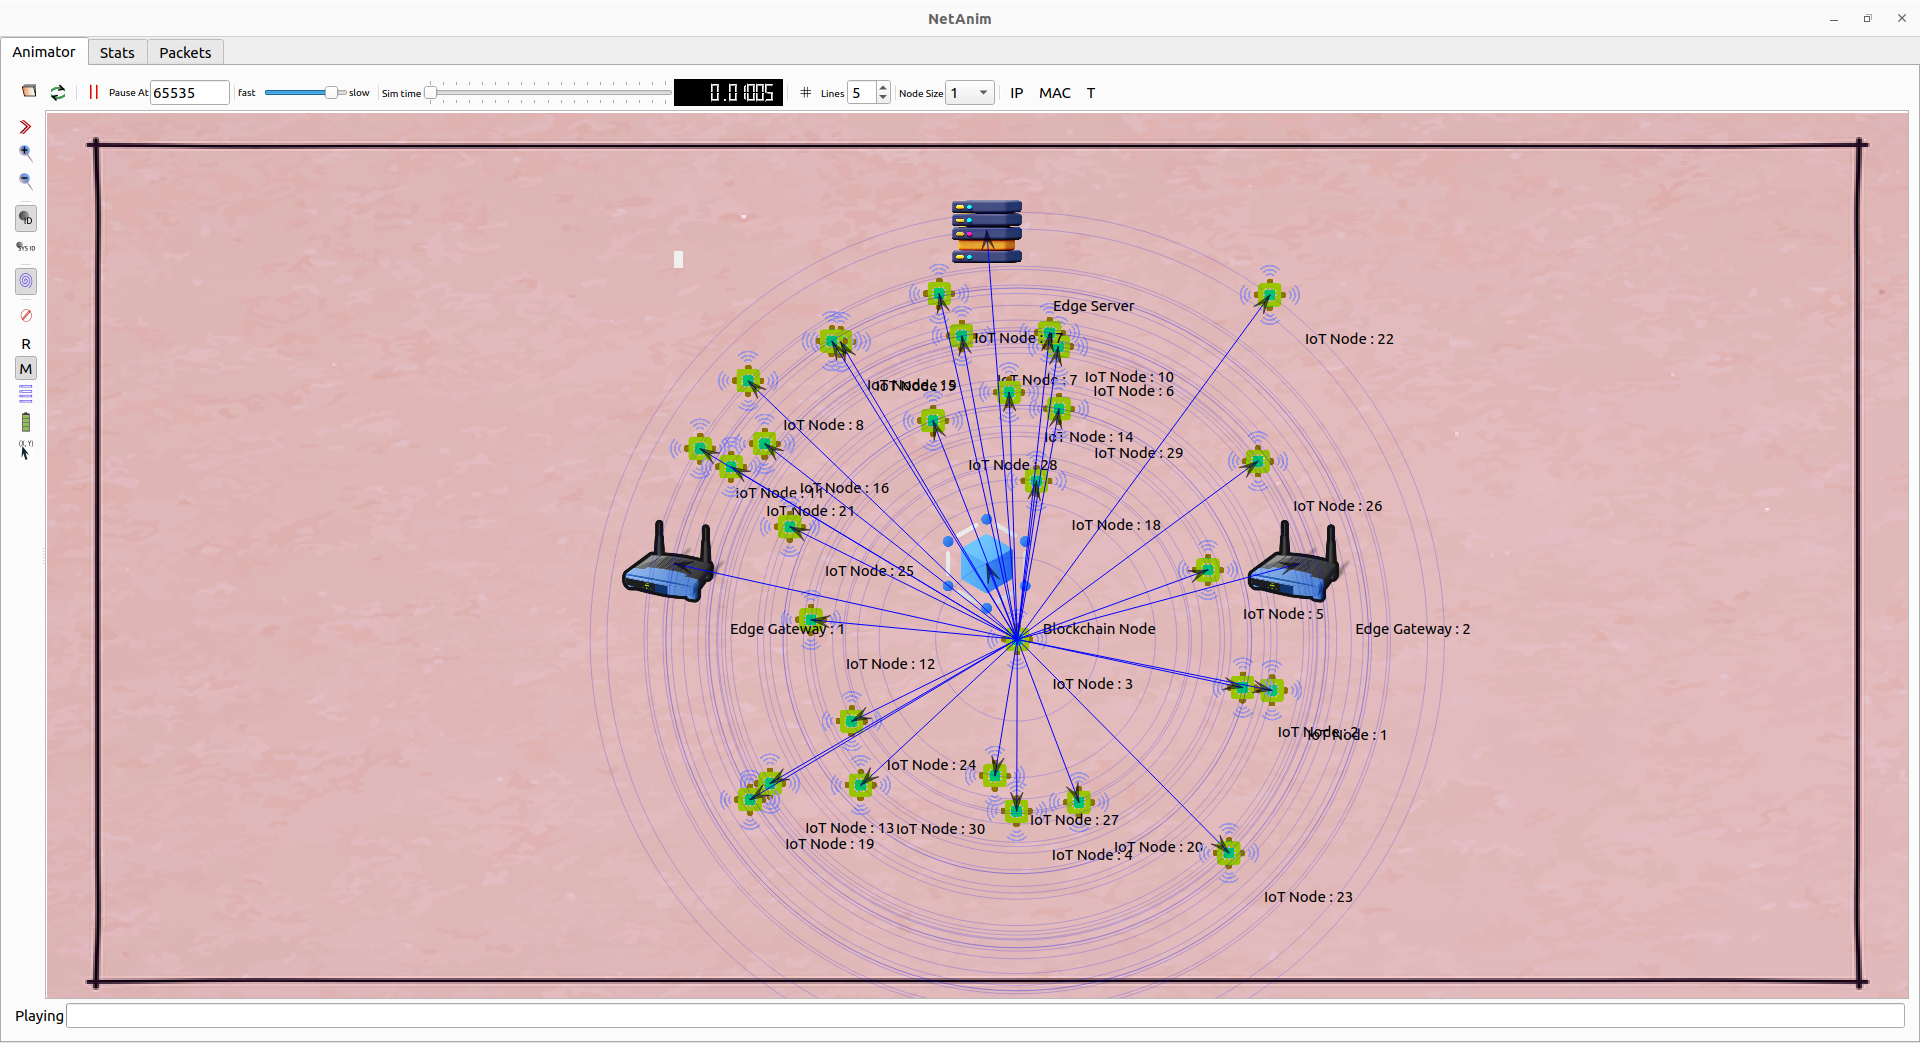
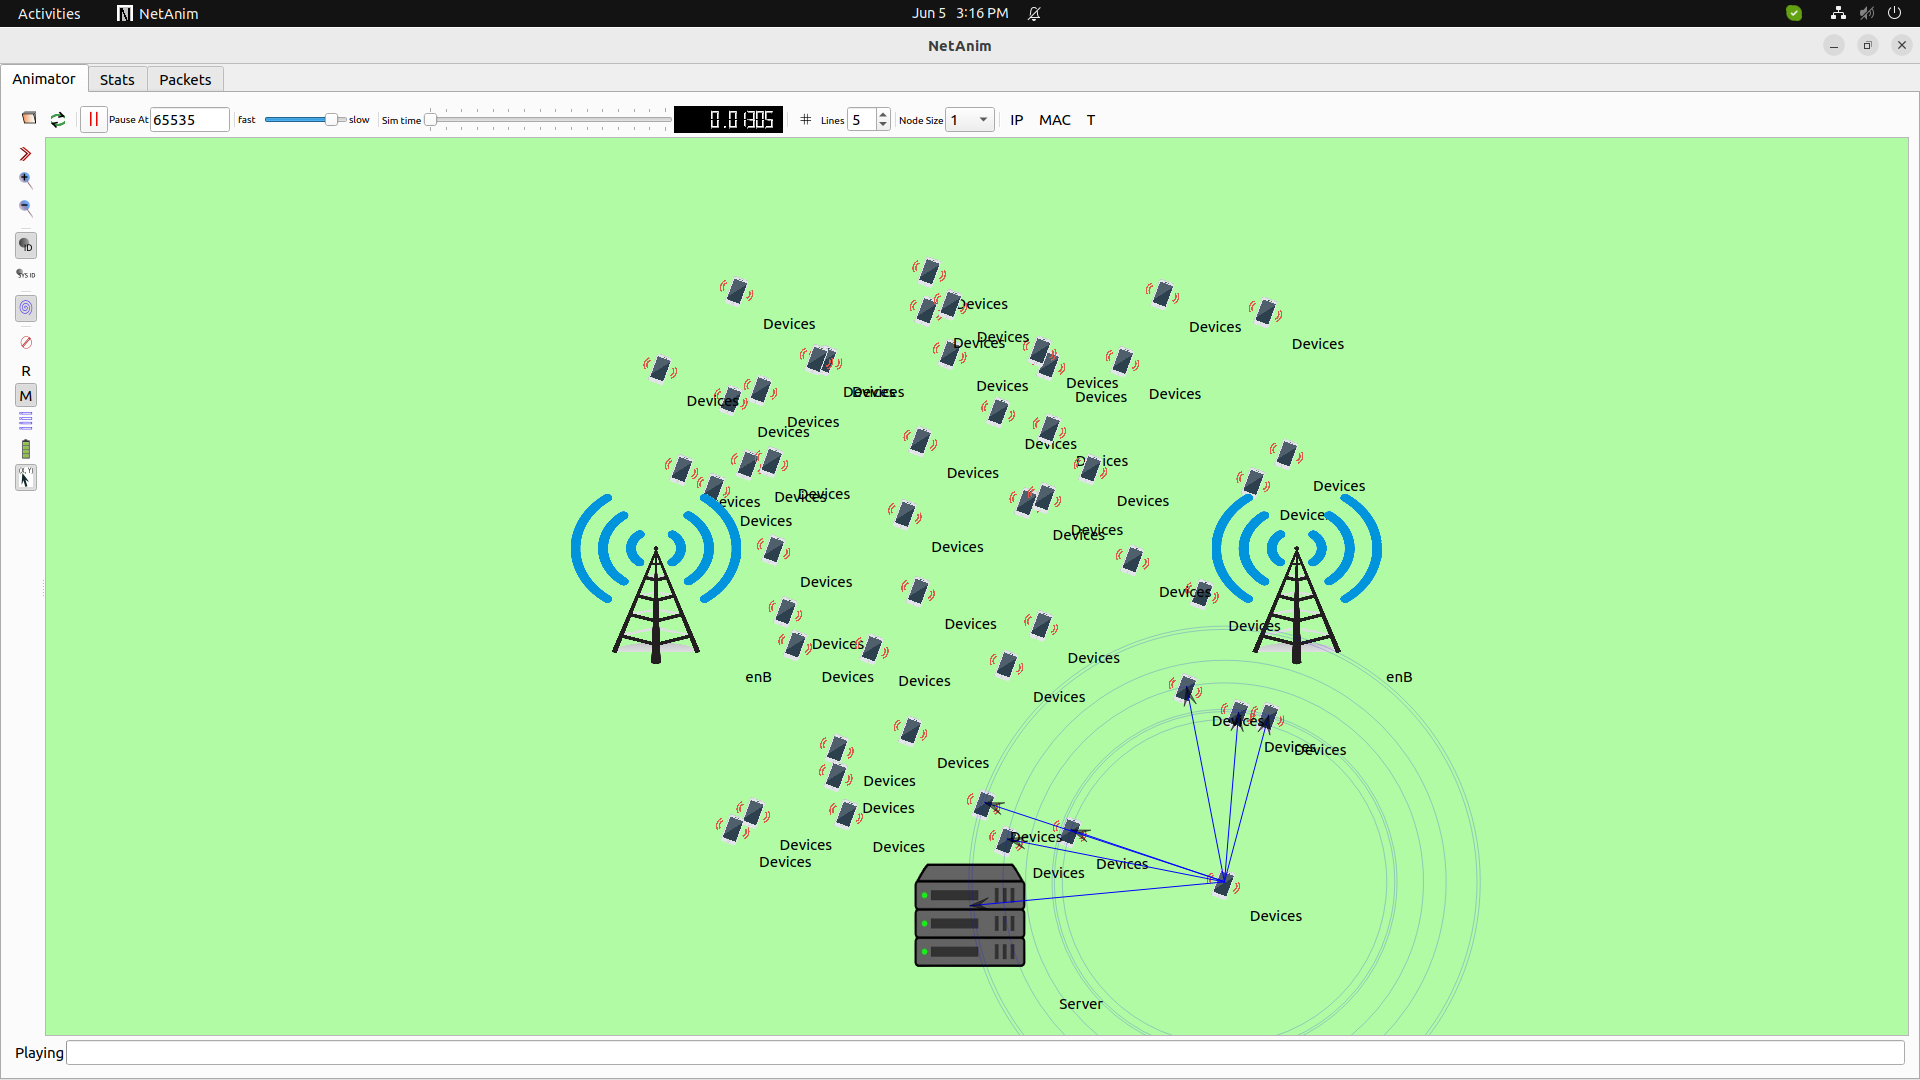
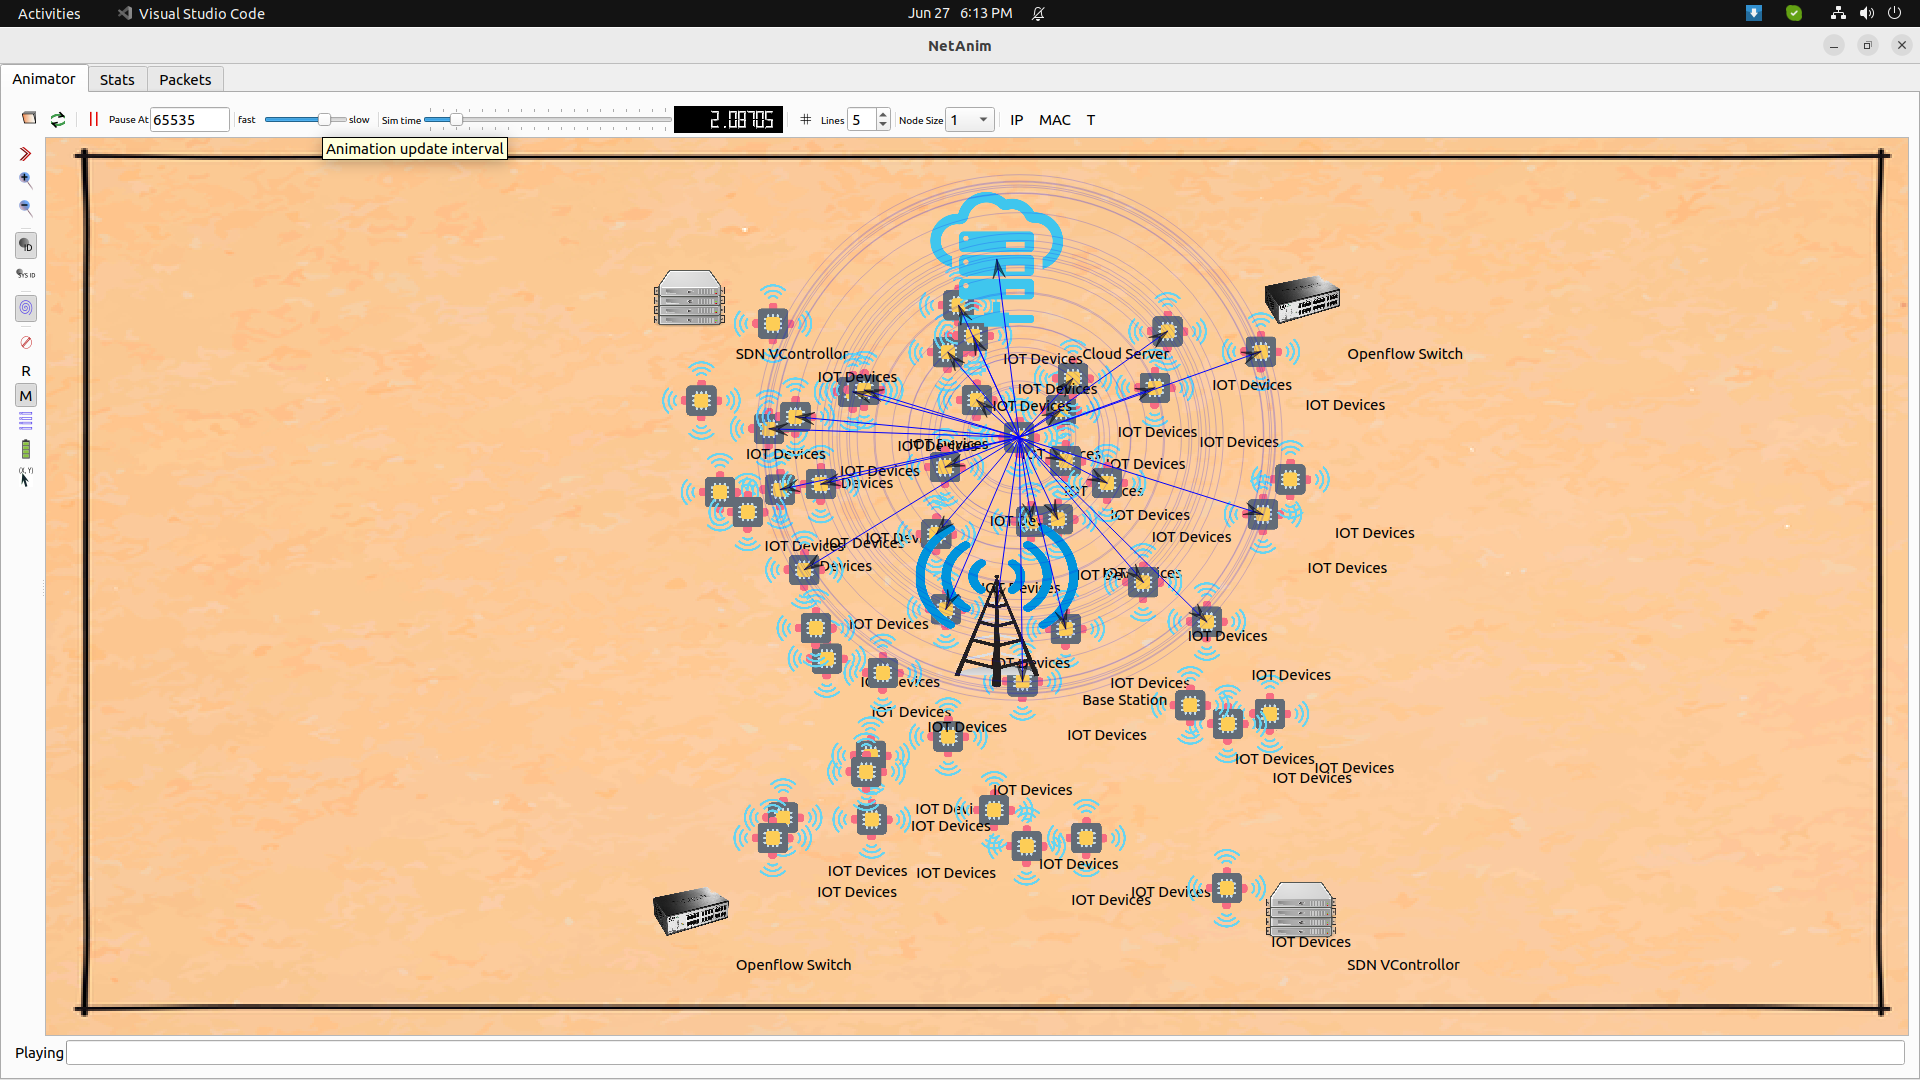
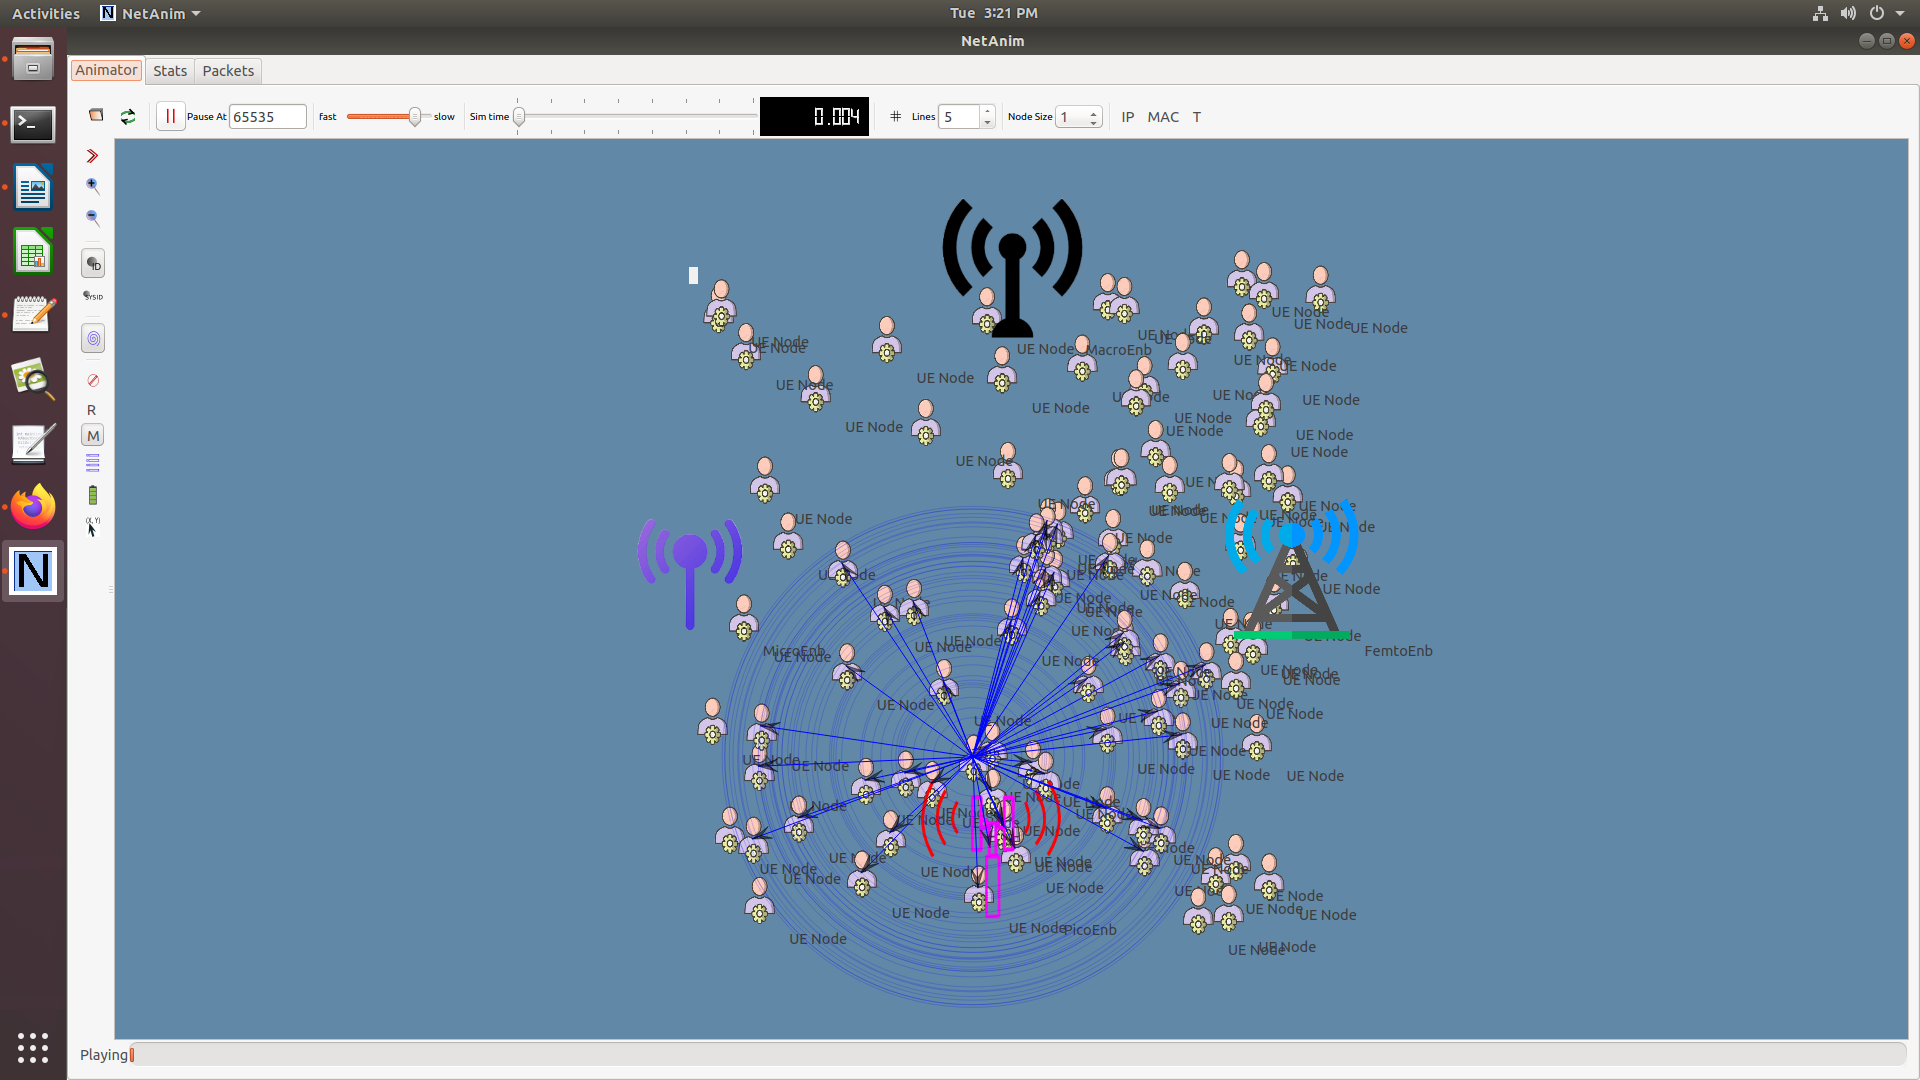
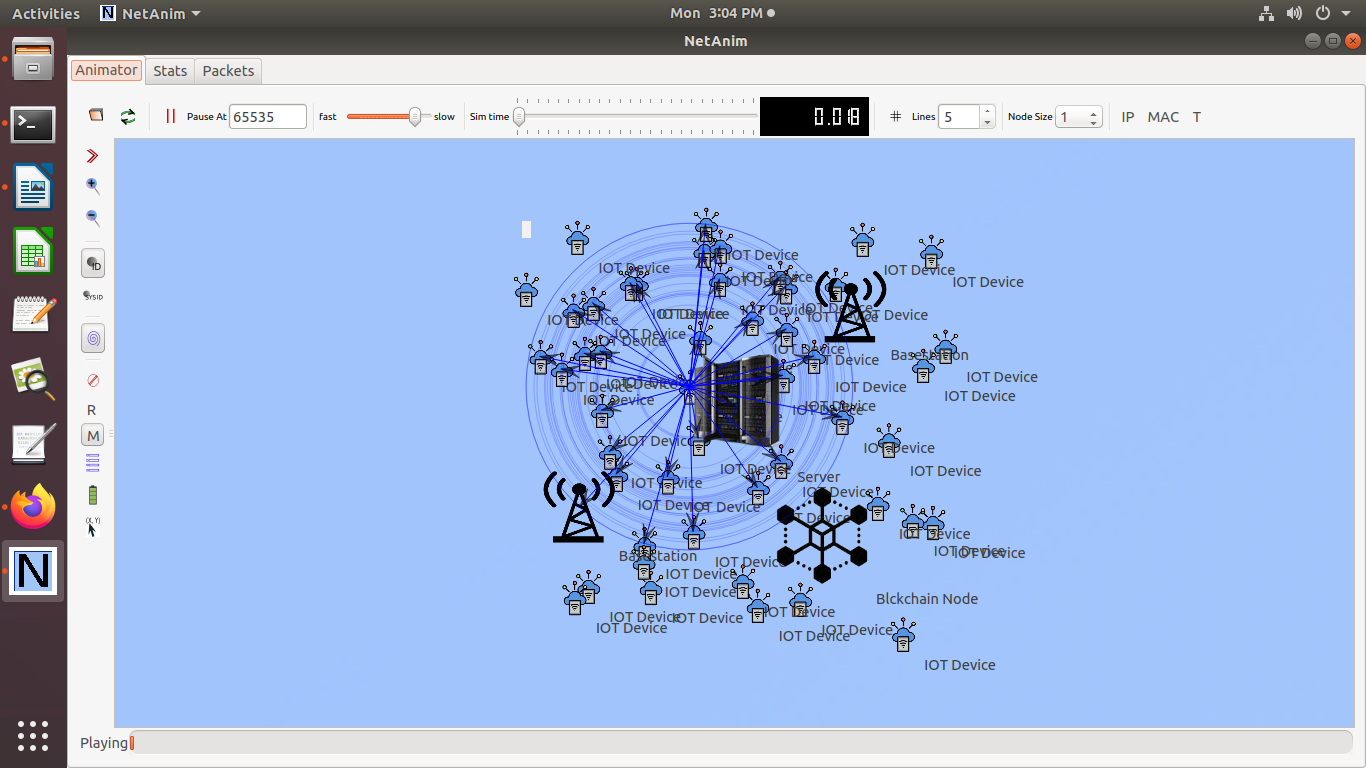
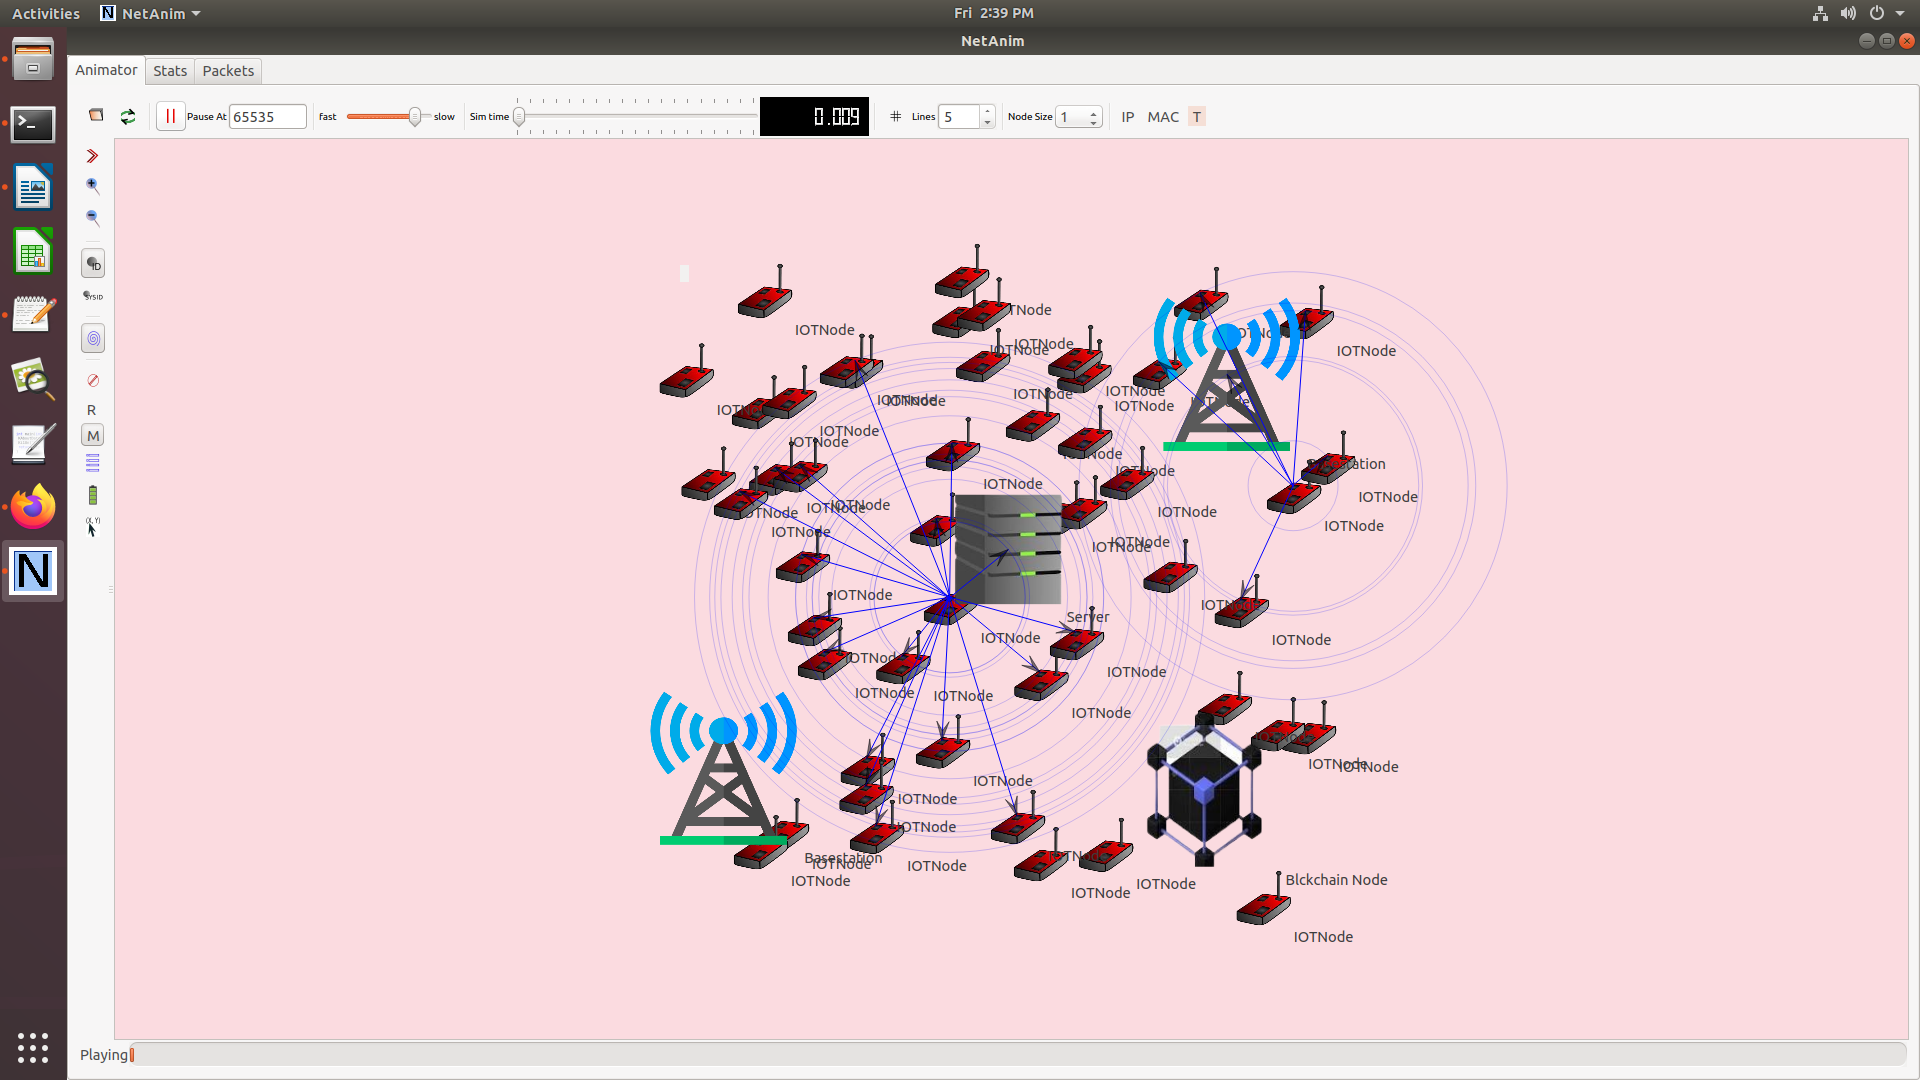
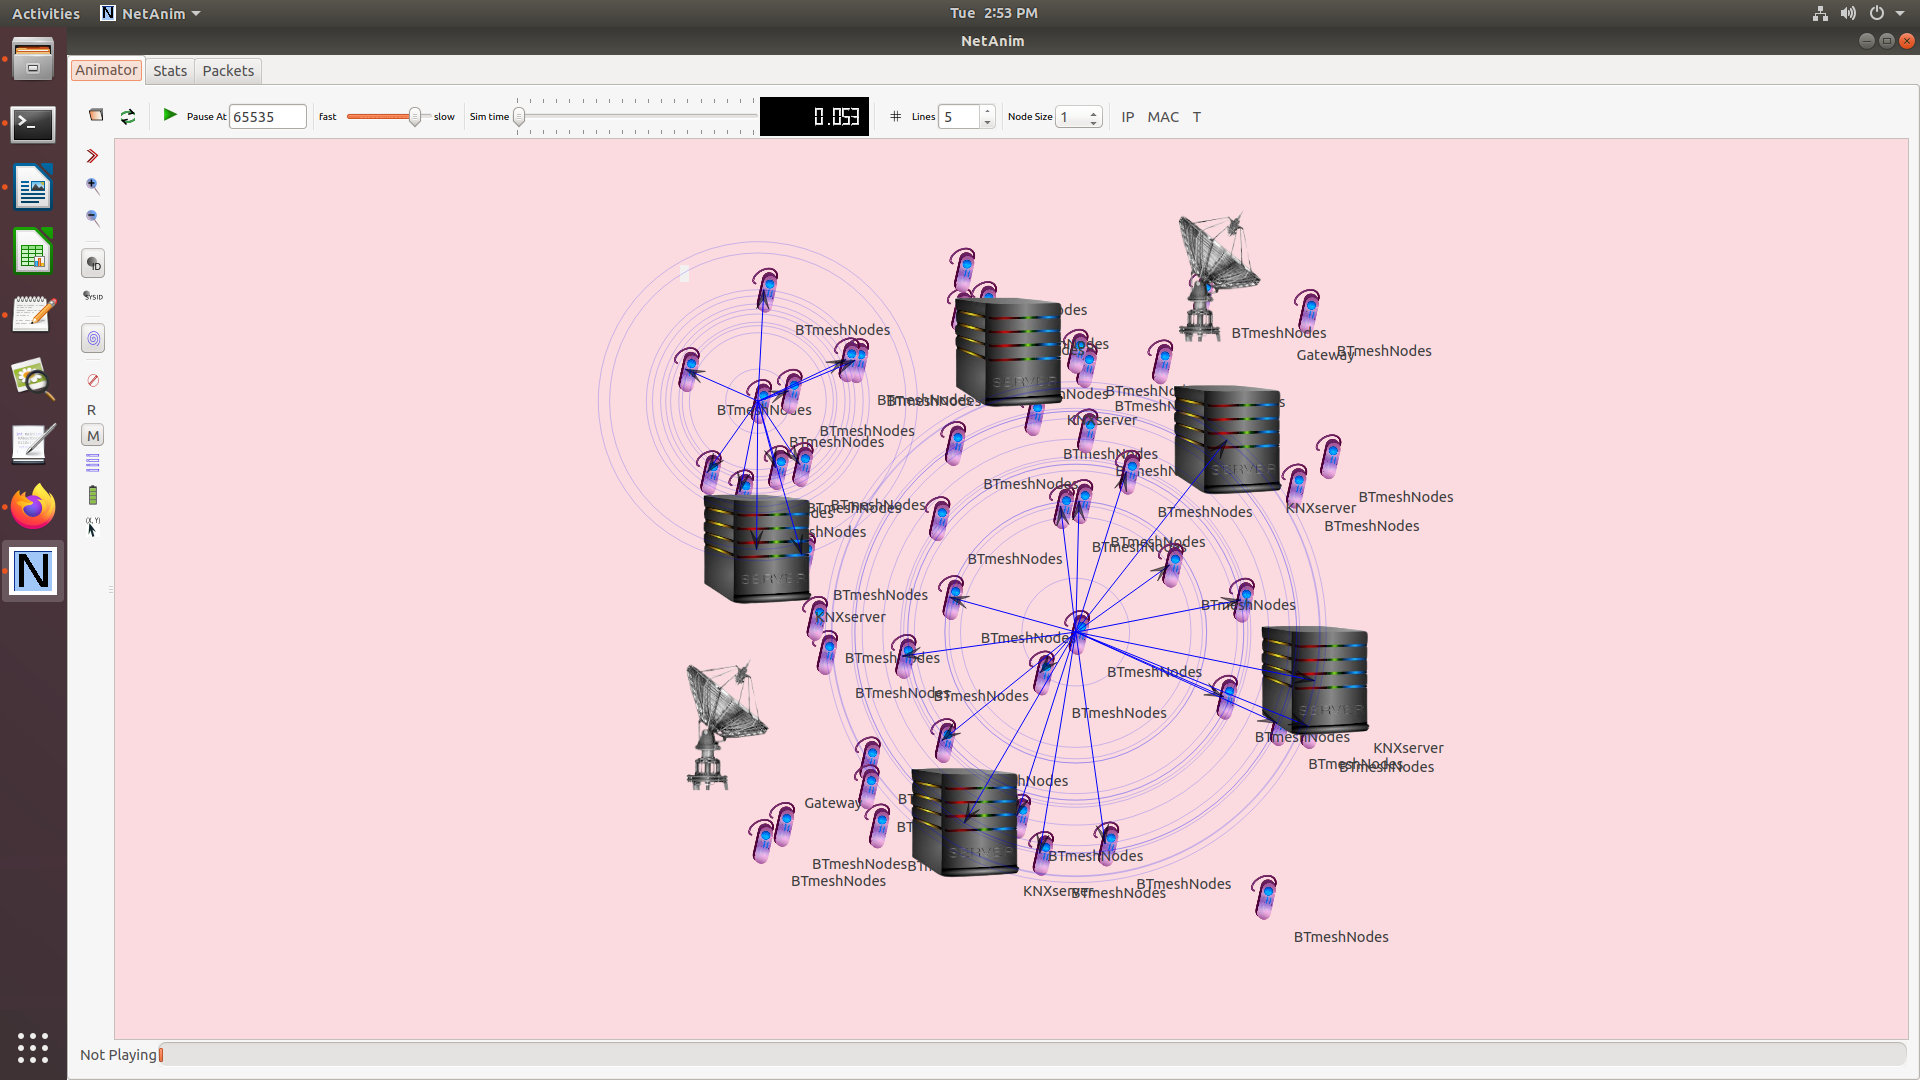
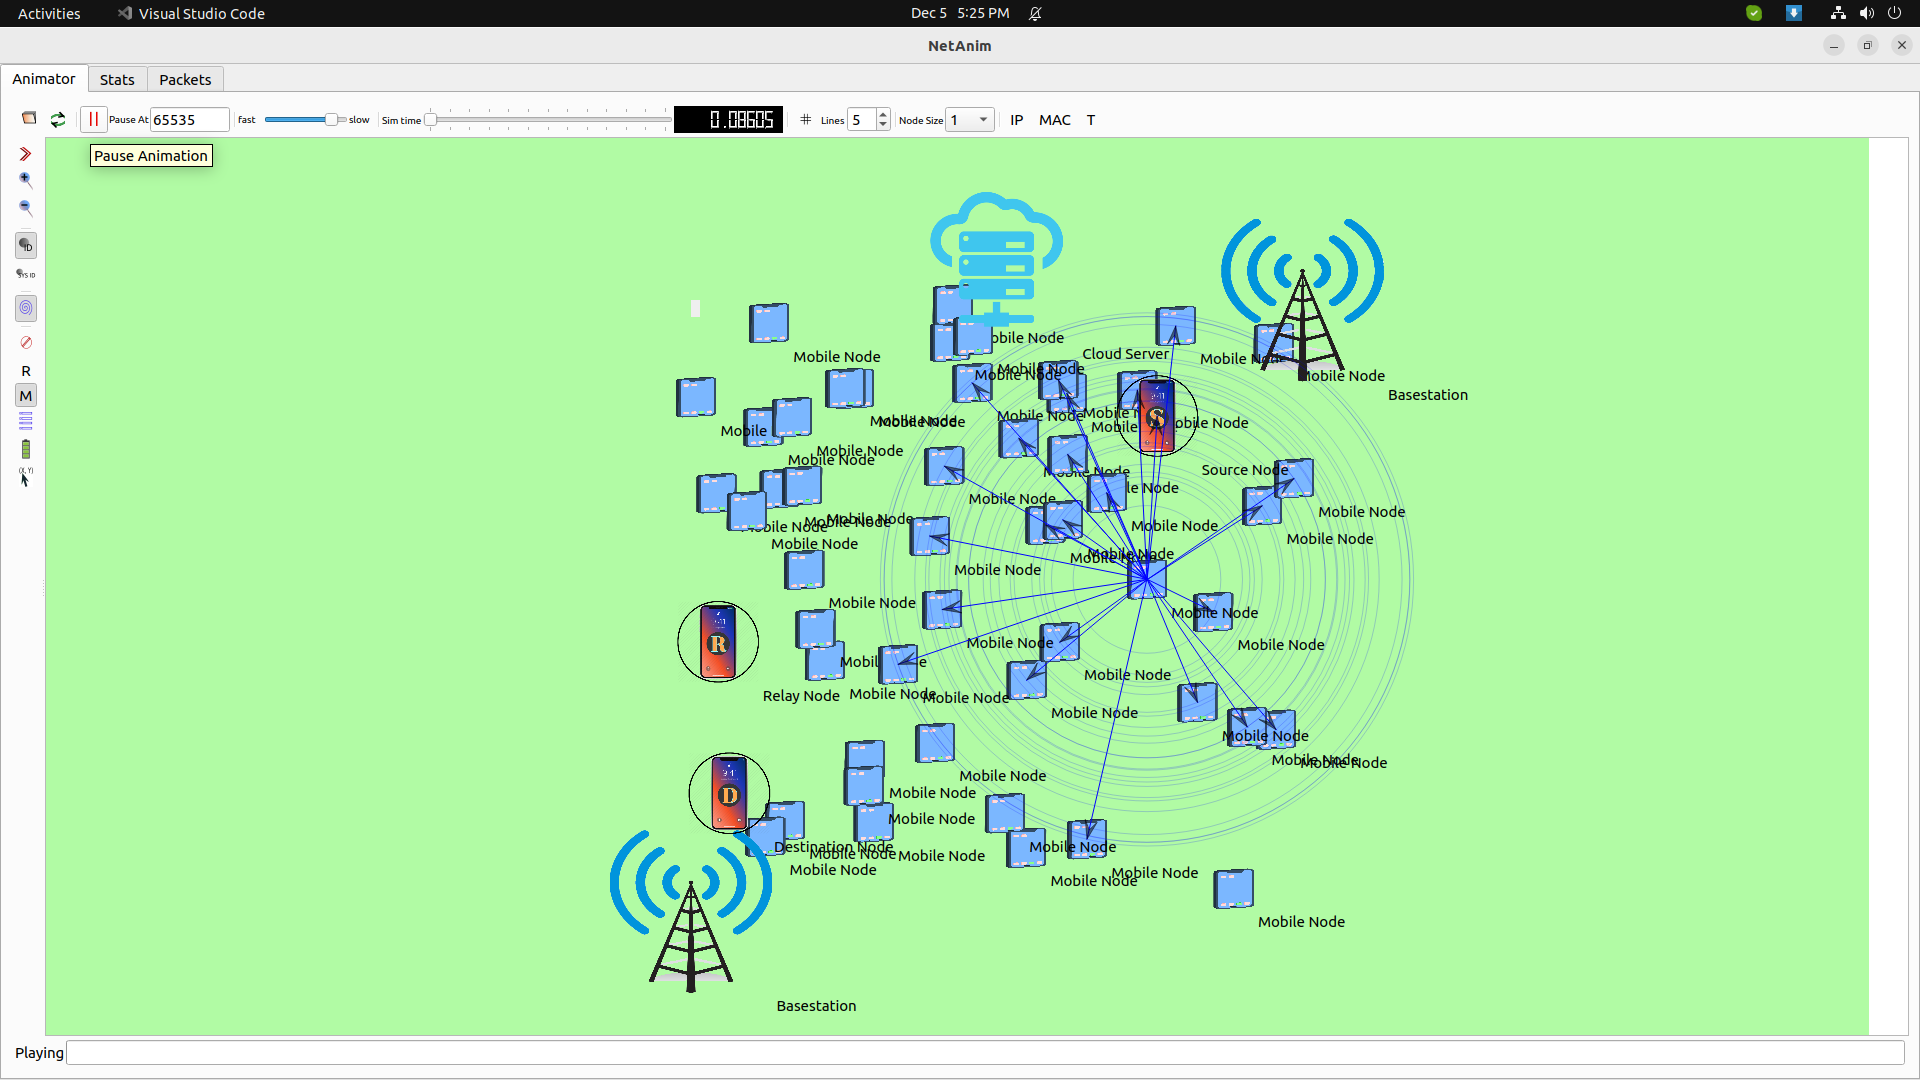
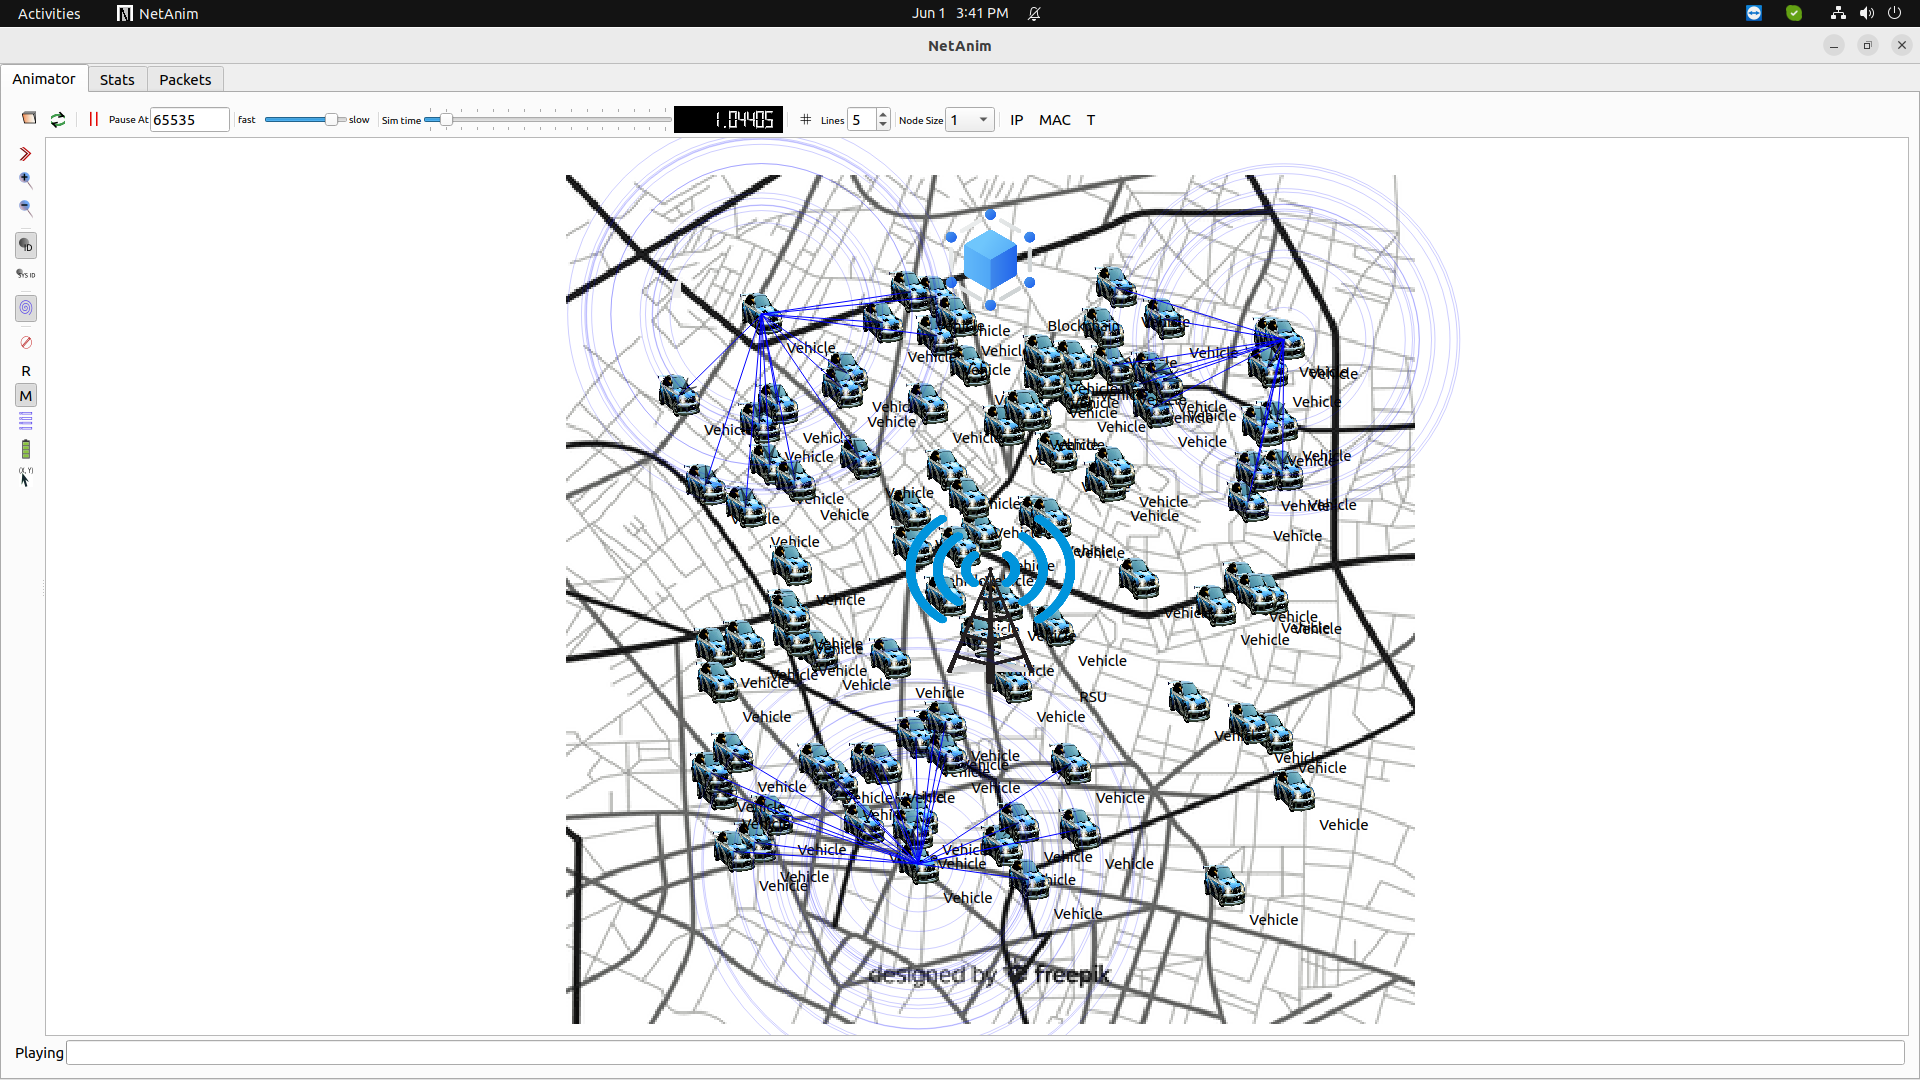
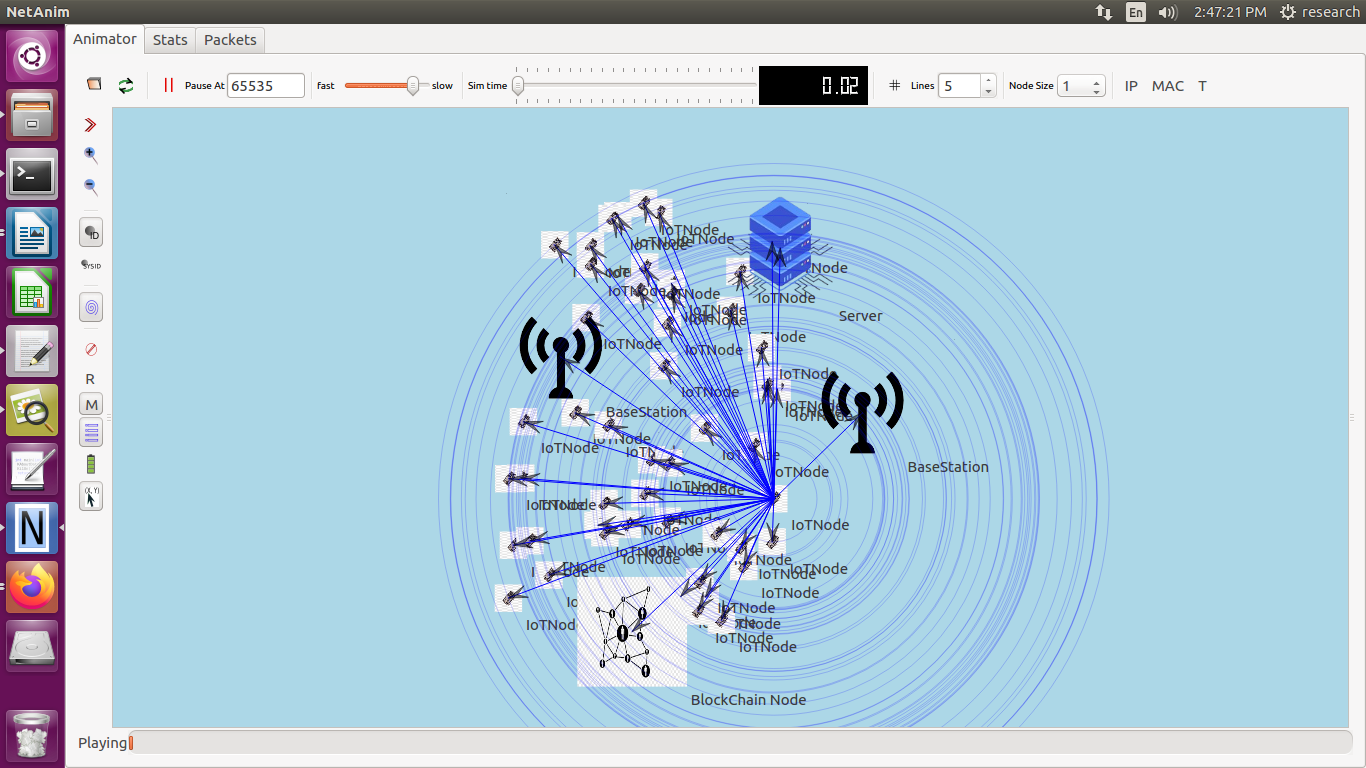
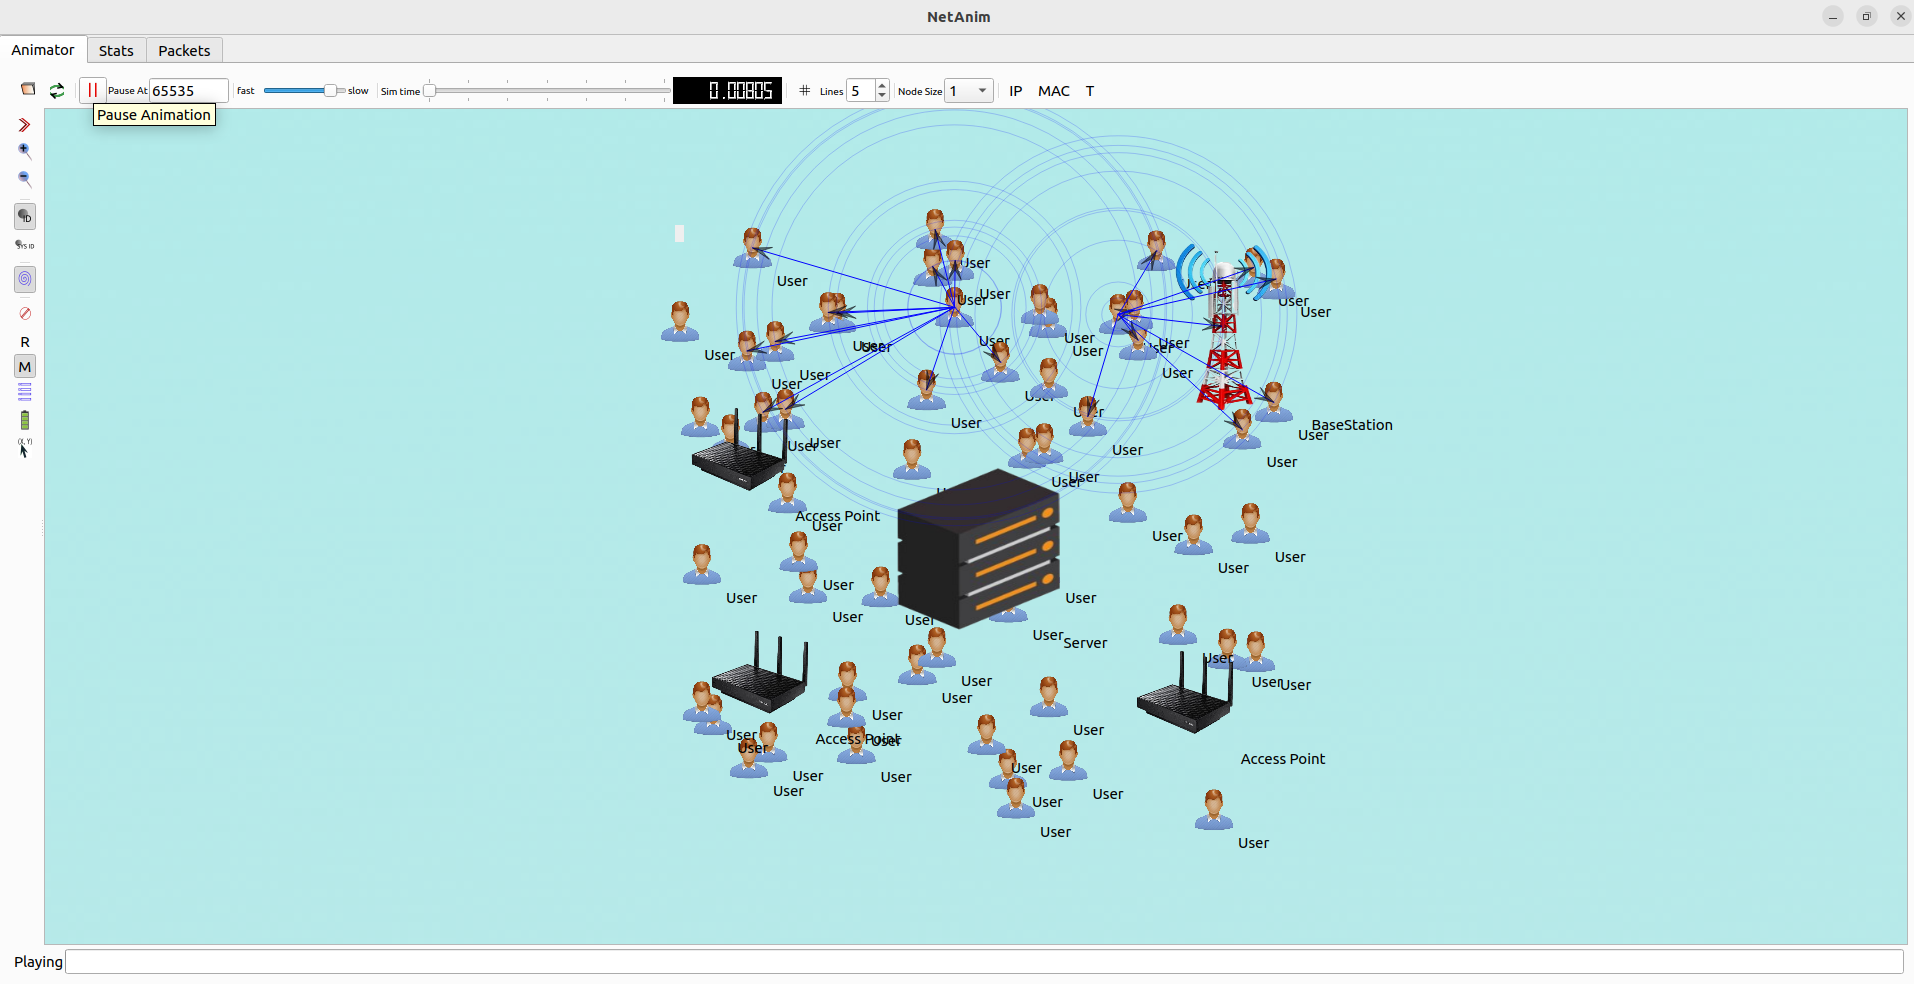
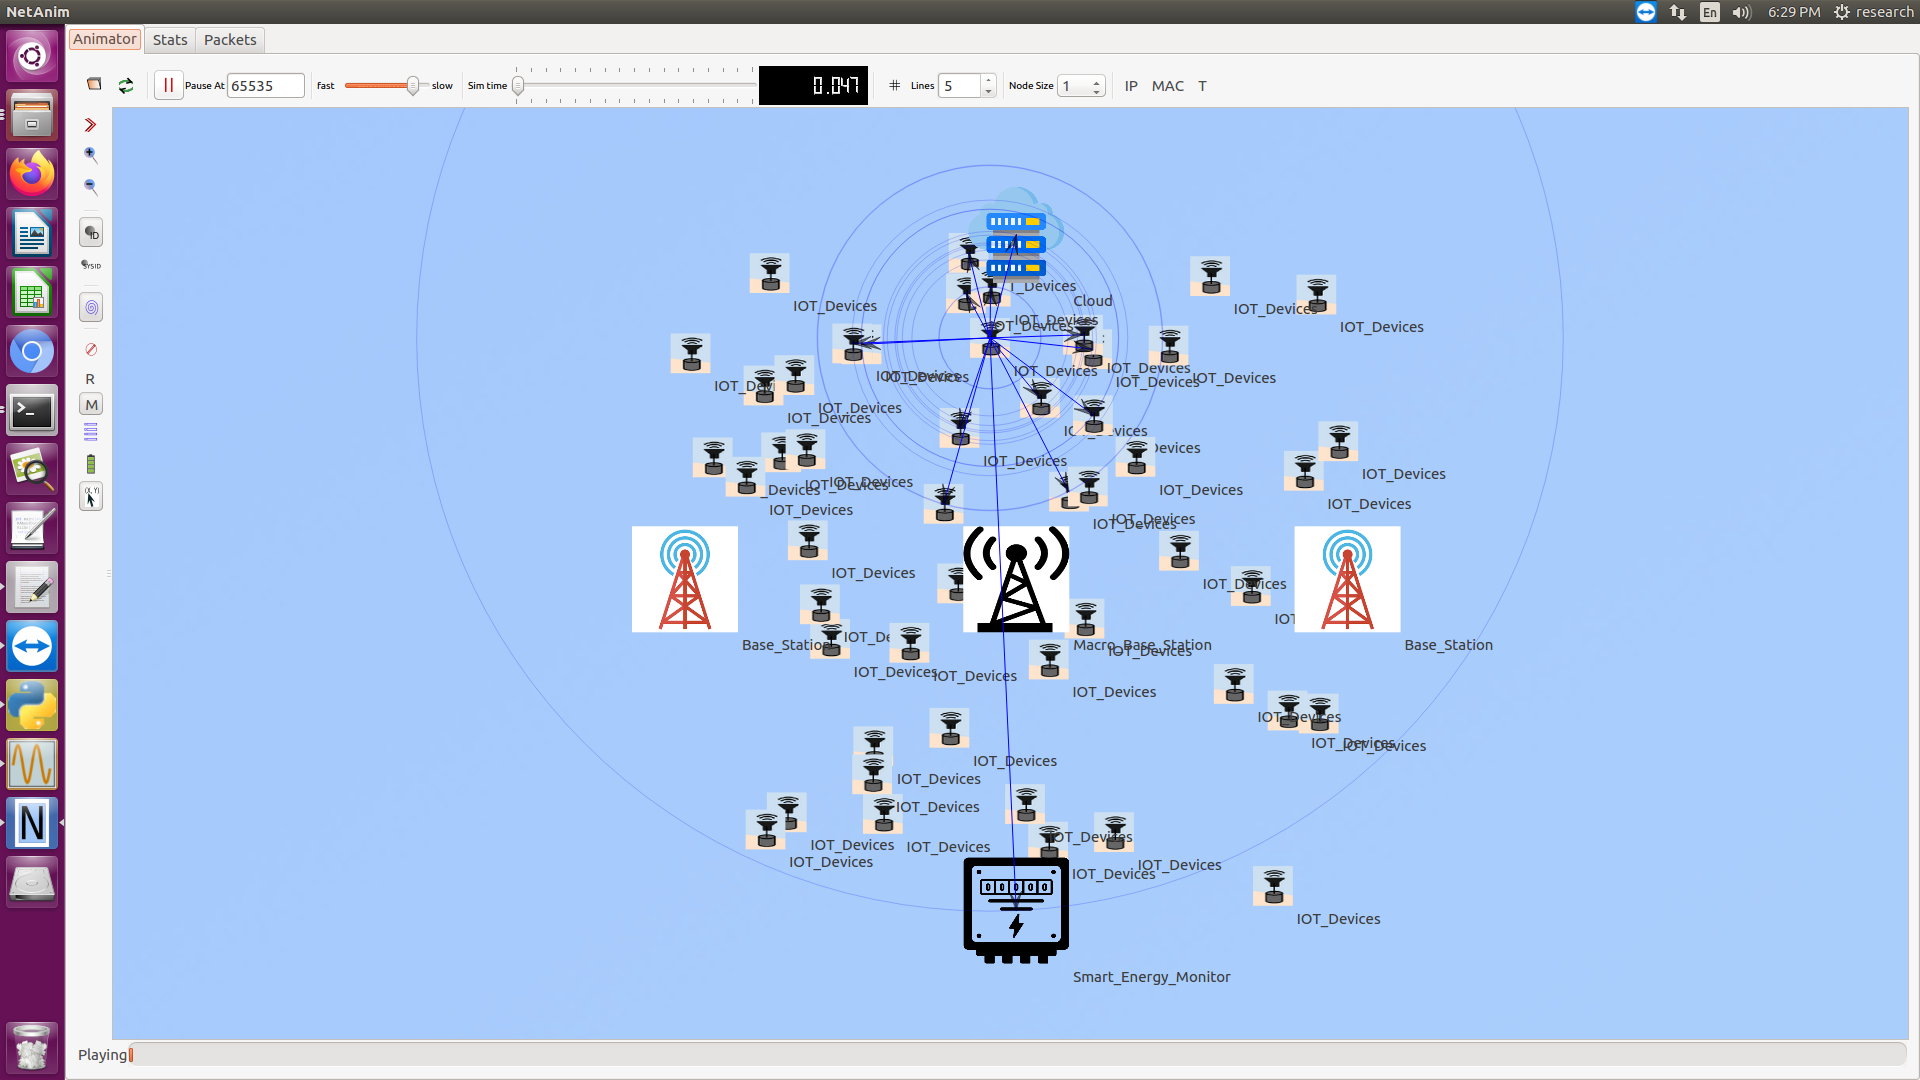
Here We shown the NetAnim Window, we will load the XML file that created by ns 3 simulation and you can see this file in ns-3.35 folder.
Screenshot:
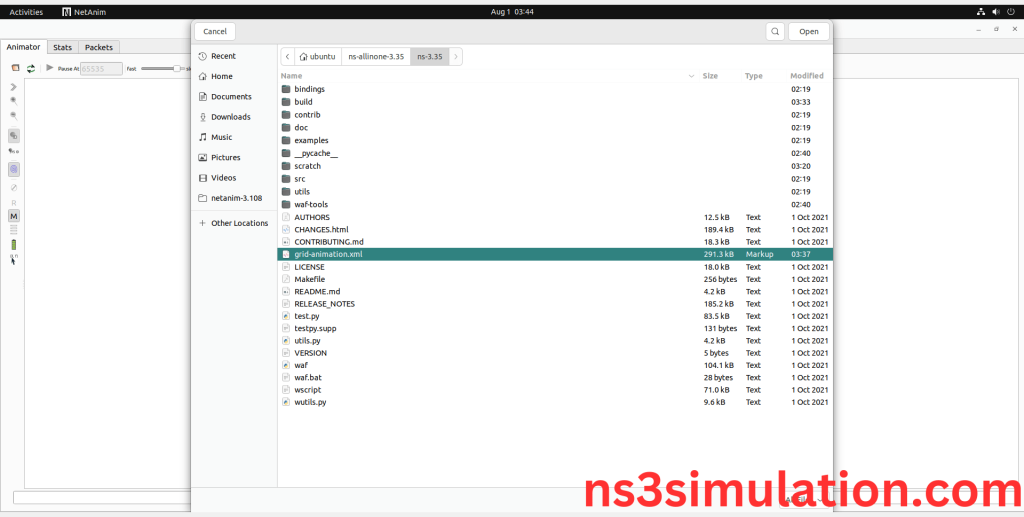
Select the xml file.
Screenshot:
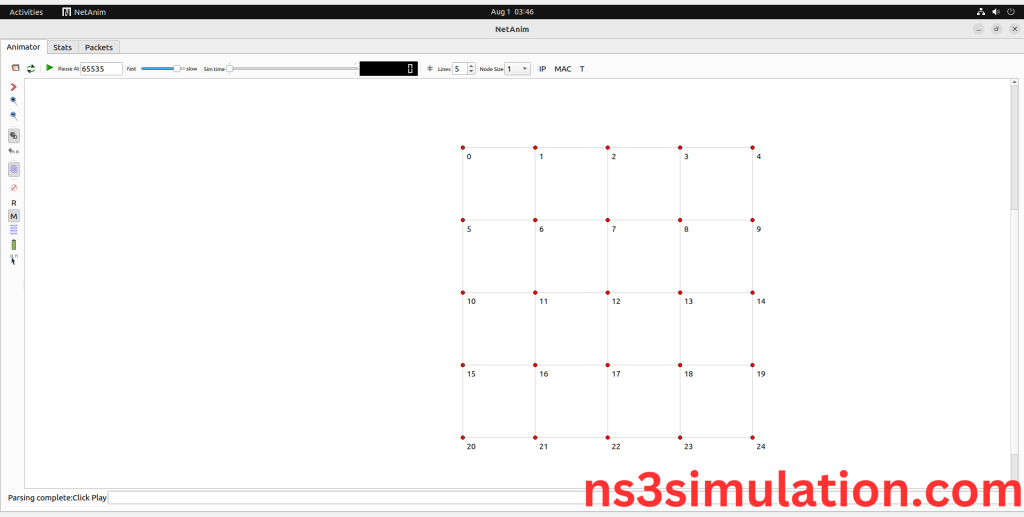
Here we display the Simulated xml file from the PyVisualizer.
Screenshot:
Click the Play Ø button to simulate the Xml file.
Screenshot:
Screenshot:
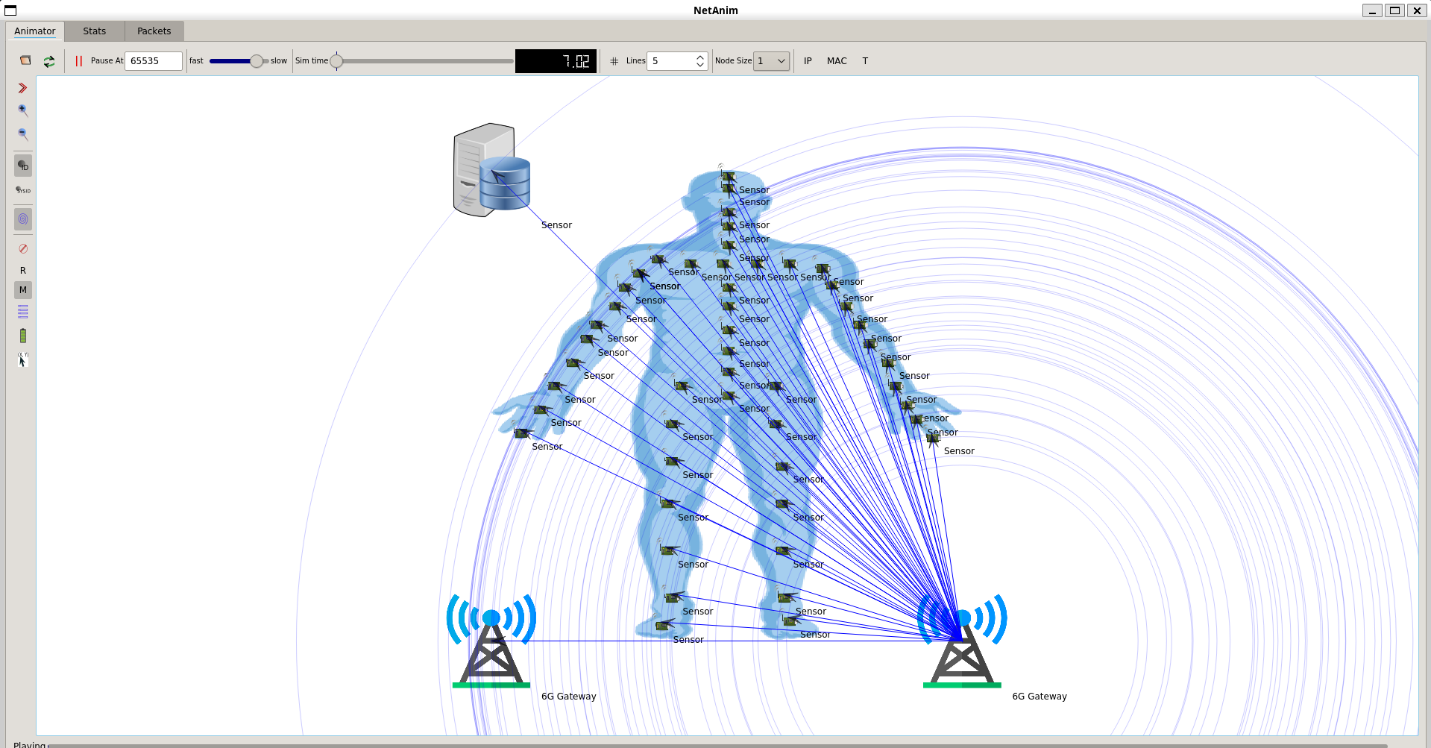
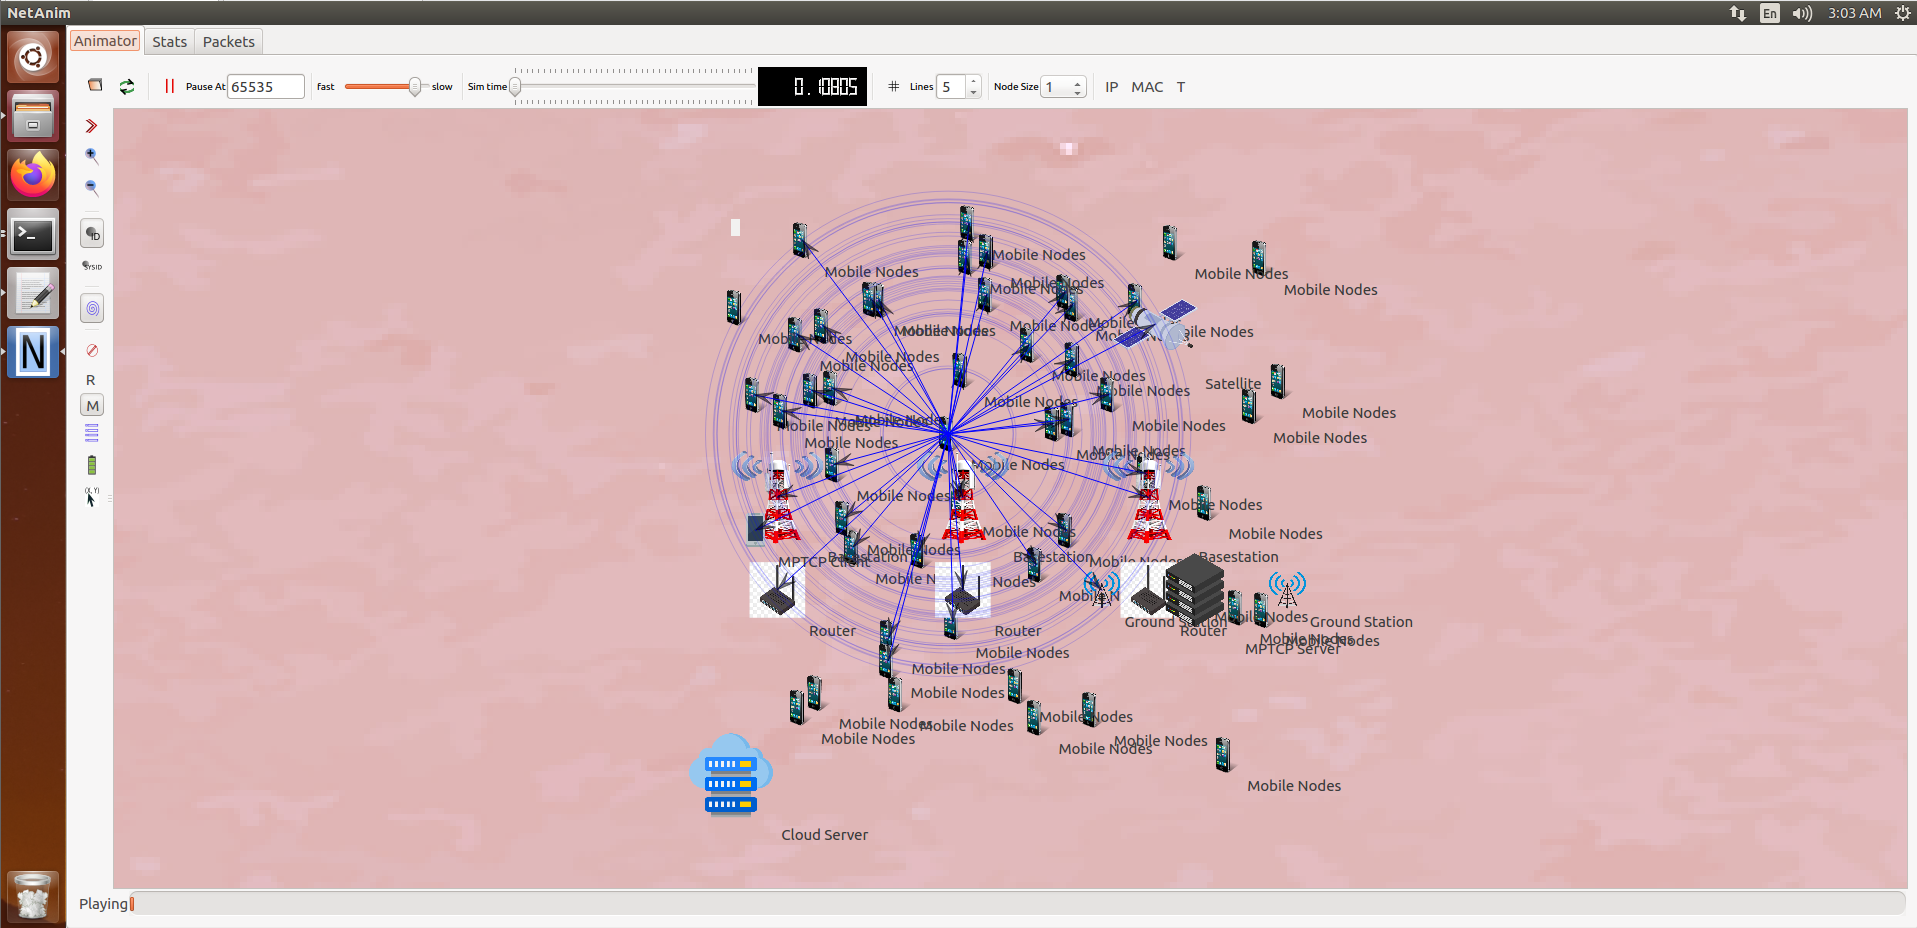
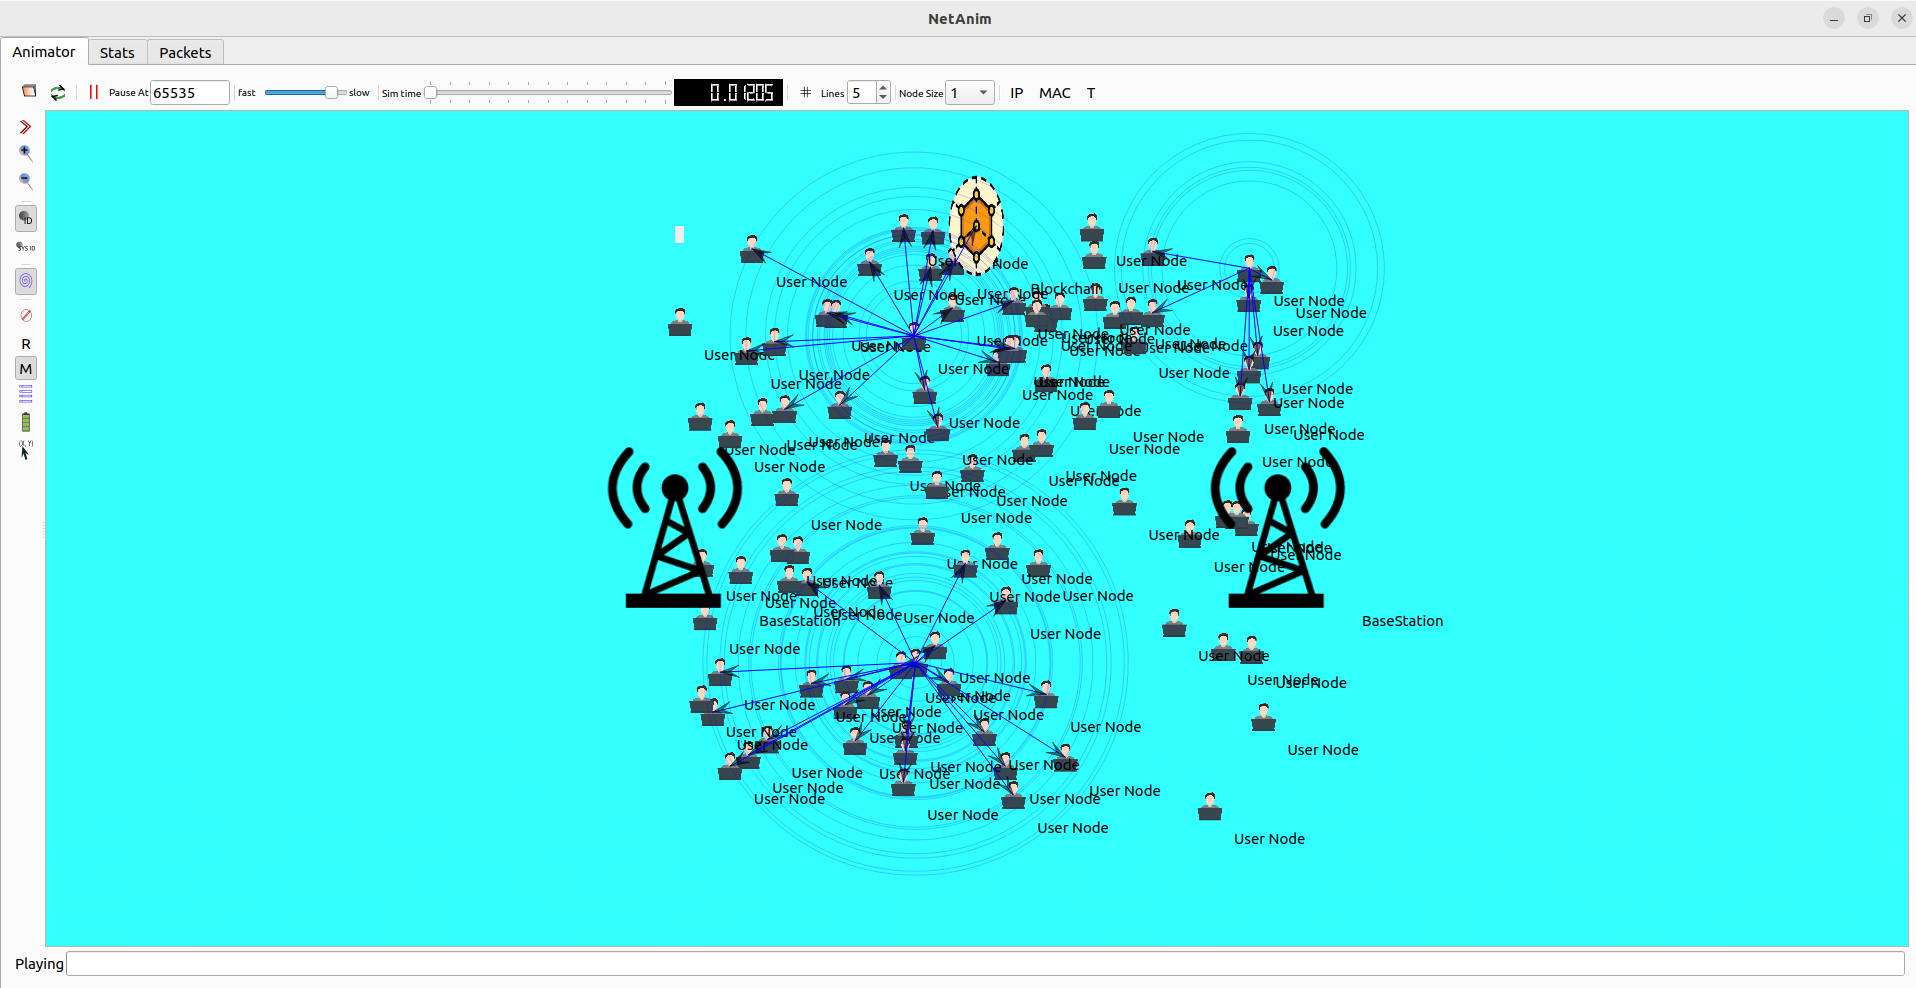
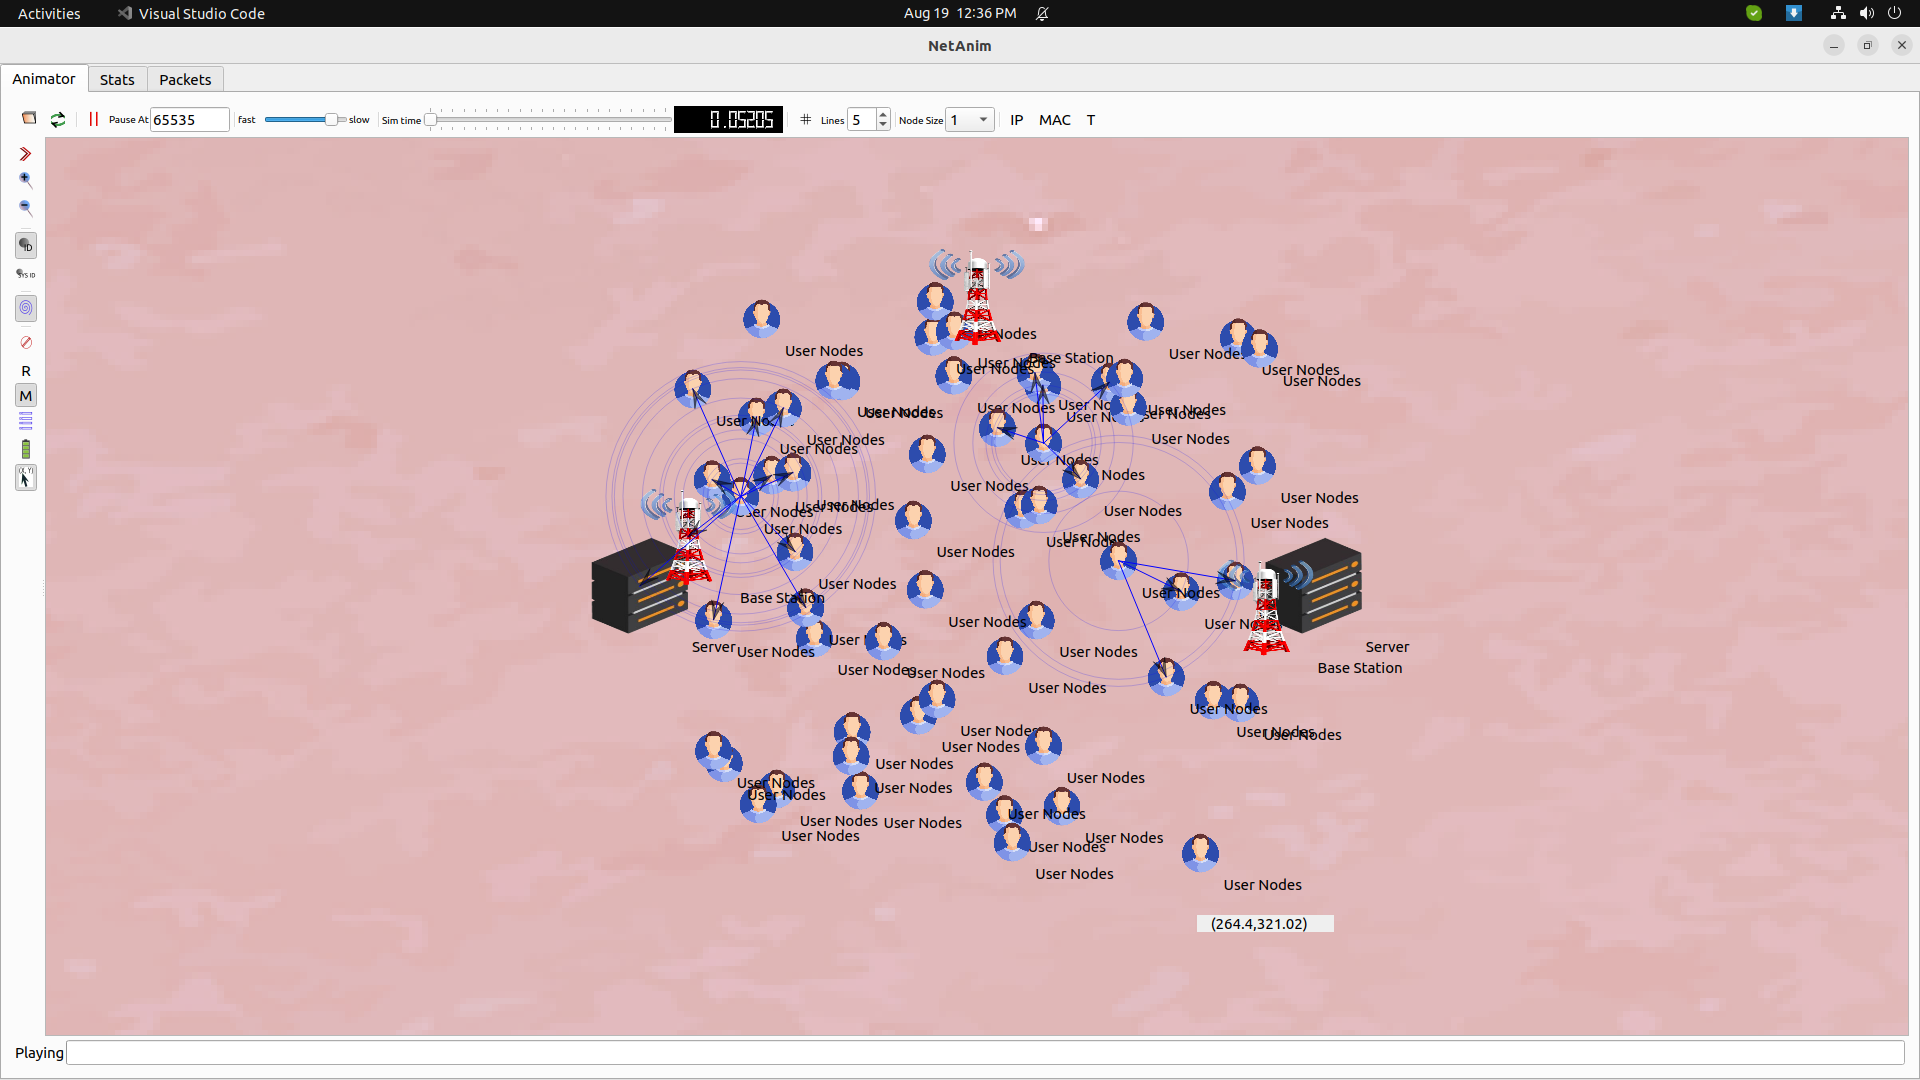
Finally, we simulated the XML file using NetAnim Successfully.
If you encounter any difficulties, feel free to reach out to us for help with NETANIM & PYVIZ installation as well as guidance on your project.


We Provide
We Provide

 Helping 1M+ Research Scholars
| Research Topics | Project | Paper | Thesis |
|---|---|---|---|
| 3D Underwater WSN | 150 | 499 | 541 |
| Hybrid Beamforming | 110 | 398 | 432 |
| Intelligent Agent WSN | 135 | 412 | 510 |
| Blockchain technology | 121 | 467 | 496 |
| Optical Networks | 149 | 398 | 465 |
| Vehicular sensor Network | 250 | 491 | 534 |
| Industrial IoT | 114 | 378 | 431 |
| Service Discovery | 170 | 419 | 489 |
| Named Data Networking | 121 | 386 | 423 |
| SDN-NDN | 110 | 427 | 498 |
| D2D Communication | 131 | 389 | 425 |
| M2M Communication | 108 | 389 | 411 |
| UWB communication | 124 | 495 | 510 |
| 5G Network Slicing | 137 | 437 | 492 |
| Delay Tolerant Network | 105 | 469 | 533 |
| Multi-Microgrid | 111 | 326 | 379 |
| Content-centric network | 100 | 296 | 304 |
| 5G Beyond networks | 131 | 379 | 409 |
| Cloud-RAN | 127 | 352 | 389 |
| Fog-RAN | 145 | 310 | 378 |
| FANET | 178 | 395 | 400 |
| Cognitive adhoc network | 153 | 325 | 363 |
| Vehicular NDN | 175 | 310 | 425 |
| Multimedia sensor network | 205 | 275 | 315 |
| V2X communication | 151 | 200 | 308 |
| Software-defined WSN | 176 | 248 | 358 |
| 5G | 201 | 289 | 365 |
| Fibre Channel / Cellular / 5G topics | — | — | — |
| Cellular Networks | 185 | 235 | 397 |
| CRN | 204 | 268 | 348 |
| IoT | 163 | 287 | 395 |
| Intrusion Detection system | 110 | 257 | 348 |
| LiFi | 101 | 279 | 386 |
| LTE | 159 | 208 | 345 |
| MANET | 175 | 247 | 395 |
| MIMO | 142 | 298 | 354 |
| Mobile Computing | 114 | 254 | 308 |
| RPL | 189 | 275 | 357 |
| SDN | 109 | 258 | 346 |
| VANET | 152 | 278 | 359 |
| Vertical Handover | 108 | 241 | 367 |
| Wireless Body Area Network | 121 | 198 | 348 |
| Wireless Communication | 178 | 248 | 371 |
| Wireless Sensor Networks | 106 | 213 | 369 |
From Topic selection to Final submission support.
Fix build errors, runtime issues, and simulation crashes.
Create real-time research-based network scenarios.
Improve simulation efficiency and execution time.
Help with result interpretation, graphs, and documentation.
Project explanation for viva, review, and presentations.
Your one-stop solution for NS-3 protocols, routing strategies, and parameter optimization—fully tailored to your research needs.

4.8 rating on Google*
Copyright © 2026 Ns3Simulation, All Rights Reserved