Our technical experts have years of experience in this field over their experience, we have derived this article. Now let’s have a look about the significance of Nam in network simulator 2.
Step: 1 Download Nam in Ns2
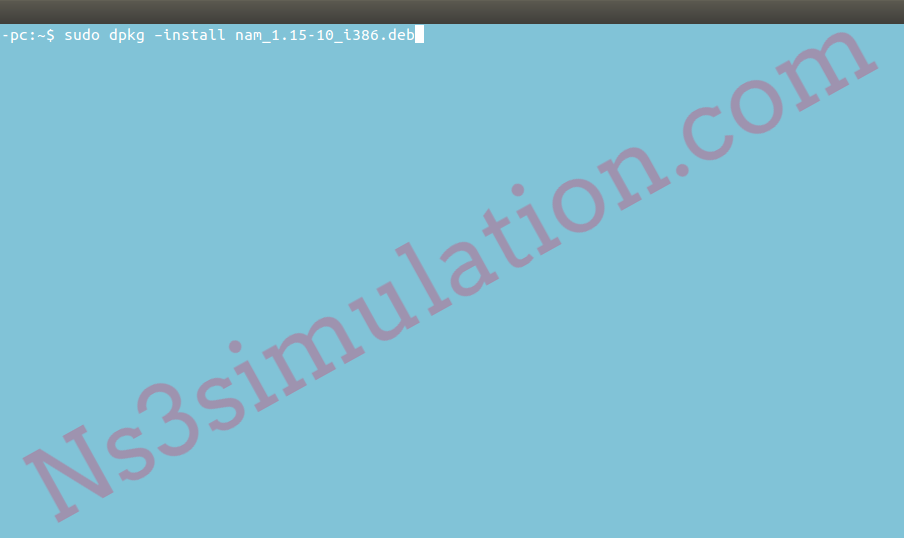
Initially, we have to download the Nam package nam_1.15-10_i386.deb from the below mentioned URL to integrate with network simulator 2.
https://drive.google.com/u/0/uc?id=0B4nUSbTYSK4TclRYODFvbWgxeWM&export=download
![Link to Download Nam in Ns2](https://ns3simulation.com/wp-content/uploads/2023/06/download-NAM-in-for-NS2.png)
Step: 2 Installation of Nam
Following that, we have to execute the below mentioned commands in the terminal window to install Nam.
sudo dpkg –install nam_1.15-10_i386.deb
![Command to Install Nam](https://ns3simulation.com/wp-content/uploads/2023/06/command-for-install-NAM.png)
Step: 3 Ns2 Source Code for Nam
In addition, we have highlighted the network simulator code to define the Nam trace file object.
set namtrace [open Simulation.nam w]
$ns trace-all $tracefd
$ns namtrace-all-wireless $namtrace $val(x) $val(y)
Step: 4 Start Nam in Ubuntu for Ns2
To start Nam in Ubuntu, we have to implement the below mentioned commands in the terminal window to acquire the below mentioned results.
nam
![Start Nam in Ubuntu for Ns2](https://ns3simulation.com/wp-content/uploads/2023/06/start-NAM-in-ubuntu-for-NS2.png)
As the consequent process, we have to select the auto generated Ns2 trace file which is stored along with the file extension .nam.
![Selection of Auto Generated Ns2 Trace File](https://ns3simulation.com/wp-content/uploads/2023/06/select-the-auto-generated-NS2-trace-file-3-1024x521.png)
Finally, we will acquire the below mentioned image as result based on Nam Ns2 trace file.
![Ns2 Trace File Based Nam Result](https://ns3simulation.com/wp-content/uploads/2023/06/NAM-result-based-on-NS2-trace-file.png)
We are providing 24/7 research support for the scholars, so you can reach us at any time to acquire a whole heap about the Ns2.