We have provided a complete overview of the NS 3.37 installation steps. Get guidance in executing it into your reasech work.
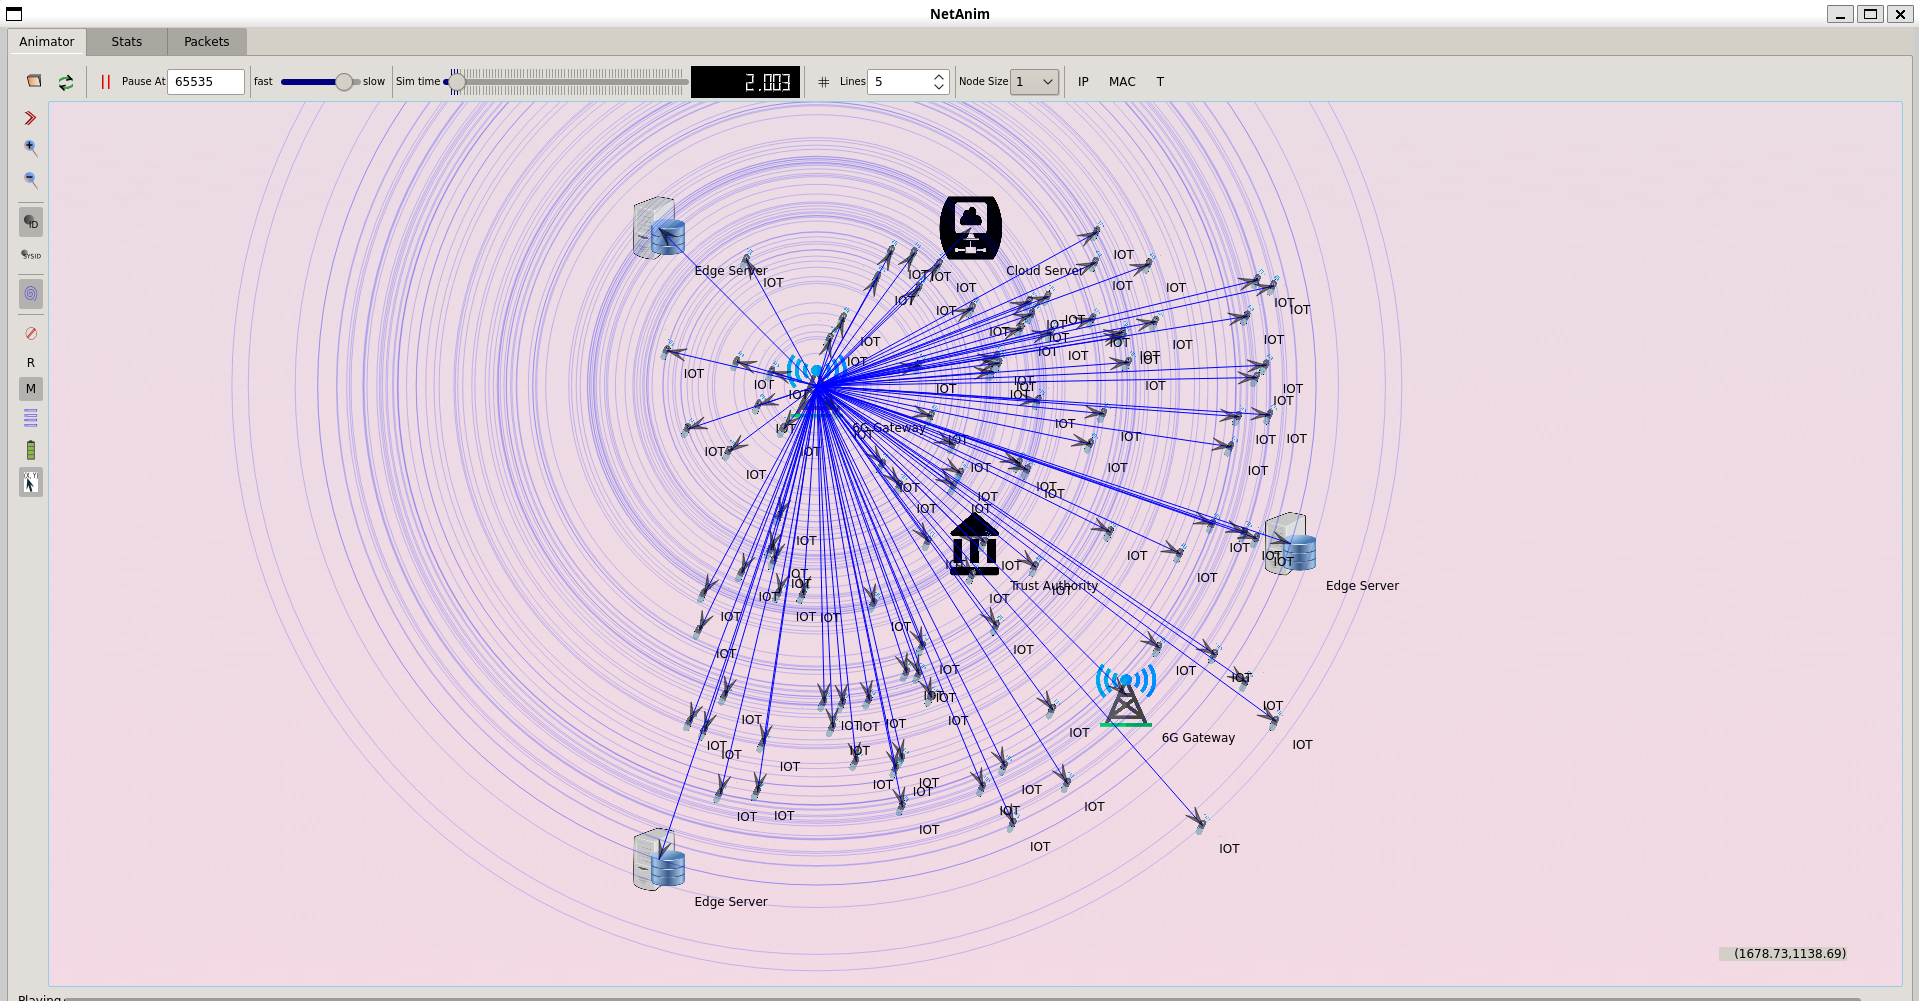
In this section, we will elaborate on Network Simulator 3 (ns-3), an open-source, versatile, and robust simulator for computer networks. It empowers users to conceptualize, assess, and authenticate the behaviour of a network or system in diverse scenarios. The simulator boasts a modular architecture, simplifying the integration of new components or the modification of existing ones. Through the utilization of ns-3, network architects and researchers can replicate network protocols, topologies, and devices, facilitating the experimentation and enhancement of pioneering network technologies and architectures.
Read out the steps for installation of network simulator 3.
PRE-REQUISITES:
- Fresh installation of Ubuntu 22.04 LTS:
Screenshot:

2.Download ns-allinone-3.37.tar.bz2 file:
We have to download the ns-allinone-3.37.tar.bz2 under home directory by the clicking the Link, it will directly download to Download Location and move the compressed file to the home Directory.
Link: https://www.nsnam.org/releases/ns-allinone-3.37.tar.bz2
Screenshot:

3.Extraction of the ns-allinone-3.37.tar.bz2 file:
Next, we have to extract the compressed file by right click and click Extract here to extract the ns-allinone-3.37 as folder in the home directory.
Screenshot:


ns-allinone-3.37 compressed file Extracted Successfully in the home directory.
INSTALL DEPENDENCIES OF NS3:
- Open a terminal, Copy and Paste the commands to install required package:
Screenshot:

2.System File Update Command:
First of all, we need to updates the list of available packages and their versions stored in the system’s package index. Use below command to update the system package.
Command: “sudo apt-get update”
Screenshot:

3.Install Essential Tools:
- g++: A C++ compiler from the GNU Compiler Collection, essential for compiling C++ programs.
- python3: The Python programming language interpreter, used for running Python scripts and applications.
- cmake: A cross-platform tool for managing the build process of software using a compiler-independent method.
- ninja-build: A small build system with a focus on speed, used for compiling and linking code.
- git: A distributed version control system for tracking changes in source code during software development.
Command: “sudo apt install g++ python3 cmake ninja-build git”
Screenshot:

Click the key Y to install the required Essentials tools for giving permission to install the package in the user system.

Installation of the Essential tools package completed successfully.
- Install Required Libraries and Development Tools:
- 2-goocanvas-2.0: GObject introspection data for GooCanvas (drawing library).
- python3-gi, python3-gi-cairo: Python bindings for GObject and Cairo graphics.
- python3-pygraphviz: Python interface to the Graphviz graph drawing package.
- 2-gtk-3.0: GObject introspection data for GTK+ graphical user interface library.
- ipython3: Enhanced interactive Python shell.
- tcpdump: Network packet analyzer.
- wireshark: Network protocol analyzer.
- sqlite, sqlite3, libsqlite3-dev: SQLite database and development libraries.
- qtbase5-dev, qtchooser, qt5-qmake, qtbase5-dev-tools: Development tools for Qt5 applications.
- openmpi-bin, openmpi-common, openmpi-doc, libopenmpi-dev: Open MPI libraries and tools for parallel computing.
- doxygen: Documentation generator for source code.
- graphviz: Graph visualization software.
- imagemagick: Software suite to create, edit, and compose bitmap images.
- python3-sphinx: Documentation generator for Python projects.
- dia: Diagram creation program.
- texlive, dvipng, latexmk, texlive-extra-utils, texlive-latex-extra, texlive-font-utils: TeX/LaTeX typesetting and utilities.
- libeigen3-dev: C++ template library for linear algebra.
- gsl-bin, libgsl-dev, libgslcblas0: GNU Scientific Library (GSL) for numerical computations.
- libxml2, libxml2-dev: XML parsing libraries and development files.
- libgtk-3-dev: Development files for GTK+ 3 graphical user interface library.
- lxc-utils, lxc-templates: Linux Containers (LXC) utilities and templates.
- vtun: Virtual Tunnels over TCP/IP networks.
- uml-utilities: User-mode Linux utilities.
- ebtables: Ethernet bridge administration tools.
- bridge-utils: Utilities for configuring network bridges.
- libboost-all-dev: Collection of Boost C++ libraries for development.
Command:
“sudo apt install gir1.2-goocanvas-2.0 python3-gi python3-gi-cairo python3-pygraphviz gir1.2-gtk-3.0 ipython3 tcpdump wireshark sqlite sqlite3 libsqlite3-dev qtbase5-dev qtchooser qt5-qmake qtbase5-dev-tools openmpi-bin openmpi-common openmpi-doc libopenmpi-dev doxygen graphviz imagemagick python3-sphinx dia imagemagick texlive dvipng latexmk texlive-extra-utils texlive-latex-extra texlive-font-utils libeigen3-dev gsl-bin libgsl-dev libgslcblas0 libxml2 libxml2-dev libgtk-3-dev lxc-utils lxc-templates vtun uml-utilities ebtables bridge-utils libxml2 libxml2-dev libboost-all-dev”
Screenshot:

Click Yes to install wireshark packages to capture the packets from Network simulator 3.


Installation of the Required Libraries and Development Tools package completed successfully.
INSTALL NETWORK SIMULATOR 3 (NS3):
- Locating the ns-allinone-3.37 Folder:
Next, we need to install the NS 3 in our system so locate the Extracted ns-allinone-3.37 folder in the home directory.
Screenshot:

2.Launching the terminal in the ns-allinone-3.37 Folder:
Then Right Click in the current Directory and select the “Open in Terminal” button and it will launch the terminal.
Screenshot:

Here, we launched the terminal by that button in the folder.

3.Building the terminal in the ns-allinone-3.37 Folder:
Next, we need to build the ns-3.37 to install the network simulation 3 Environment in the User system and it will build the netanim also. So, use the command to build the ns-3.37.
Command: “./build.py”
Screenshot:

Netanim Building process:
Screenshot:

Ns-3.37 Configuring process:
Screenshot:

The “./ns3 configure” command is to configure the Network Simulator 3 (NS-3) environment. This command is typically used to set various parameters, such as the simulation duration, network topology, and node properties. It can also be used to specify the output format and other simulation settings.
Screenshot:

Ns-3.37 Configuration Completed successfully.
Ns-3.37 Building process:
Screenshot:

The “./ns3 build” command is used to build the Network Simulator 3 (NS-3) framework from its source code. When use this command, It will compiles the source code, generates the Makefiles, and builds the NS-3 binary and libraries and make Runnable Environment.
Screenshot:

4.Enable Python Bindings:
The Python bindings for NS-3 are a set of Python modules that allow you to use the Network Simulator 3 (NS-3) library from within Python. With the Python bindings, you can leverage the power of NS-3 to simulate and analyse network behaviour without needing to write code in C++.
Next, we will use the python bindings enable command to activate the python bindings and we can see the enabled output in the ns3 Configuration.
Command:
“sudo apt-get install python3-pip
python3 -m pip install –user cppyy==2.4.2”
Screenshot:

Screenshot:

Pip package installed successfully in python.
Screenshot:

Here we installed the python bindings required packages successfully.
Ns-3.37 Location Change:
Change the location to the ns-3.37.
Command: “cd ns-3.37”
Screenshot:

Ns-3.37 Configuring process:
The Ns 3.37 configuration of the Network Simulator 3 (NS-3) environment. This command is typically used to set various parameters, such as the simulation duration, network topology, and node properties. It can also be used to specify the output format and other simulation settings.
Command: “./ns3 configure –enable-python-bindings”
Screenshot:

Ns-3.37 Configuration Completed successfully.
Ns-3.37 Building process:
Screenshot:

The “./ns3 build” command is used to build the Network Simulator 3 (NS-3) framework from its source code. When use this command, It will compiles the source code, generates the Makefiles, and builds the NS-3 binary and libraries and make Runnable Environment.
Screenshot:

Ns-3.37 Installed successfully in the Ubuntu 22.04 system. If you encounter any difficulties, please don’t hesitate to seek further assistance from ns3simulation.com.